The bed is the main and central piece of furniture in any bedroom. People spend about a third of their lives sleeping, which means that the choice of bed and bedding must be approached seriously and responsibly. Designers are constantly creating innovative models of mattresses and beds, so there is a huge variety of bedroom furnishings. Most of them not only fulfill the main purpose of providing a person with a comfortable sleep, but also help decorate the interior, giving it a certain style and originality.
Installing or updating a headboard is the fastest and easiest way to transform the overall mood of your bedroom. Among the various options, the most popular is a soft headboard for a bed, which, due to its design, gives the sleeping area a special coziness, softens sharp corners, and sets the mood for a comfortable rest. Of course, this part can be purchased in stores separately or as an element of the bed frame, but many prefer to make a soft headboard with their own hands, giving free rein to their imagination and creative ideas. We offer several master classes on how to make an interesting headboard, and also look at other models of craftsmen and designers for inspiration.
DIY soft headboard “Carriage screed”
Carriage binding is a decorating technique that was widely used in the 18th century to decorate carriages (hence the name). Today this method is used for upholstery of upholstered furniture and interior items. The modern name for the carriage screed is capitonne. In order for the result to look truly impressive, it is recommended to use expensive, rich material that looks good with numerous folds, for example, leather, velvet, velor, faux suede. Light cotton with small flowers is a completely unsuitable fabric.
The screed pattern itself can be made in the form of squares or diamonds; buttons covered with the same fabric, beads, and crystals in color or contrast are used as rivets.
Materials and tools:
plywood for the base (furniture board); high-quality fabric (with a margin of 25-30 cm more than the length and width of the plywood base); foam rubber about 5 cm thick (according to the size of the plywood sheet); synthetic winterizer; covered buttons with an eye; drill for drilling plywood ;sharp knife;knitting hook;universal glue;strong lace (rope, twine to fit buttons through the eye);furniture stapler with thickened staples;scissors;wall fastenings and screws.
Progress
Take a sheet of plywood, you can use a rectangular one or cut it into an interesting shape. In this example, two boards are used with dimensions: 200 cm by 60 cm and 140 cm by 60 cm. Cut the foam rubber to the size of the plywood base. Mark the places where the buttons are attached on the foam rubber, for example, in three rows in a checkerboard pattern.
Next, use a sharp knife to cut holes in the foam for the buttons.
A fun way to make holes is to use a heated metal tube. Heat the tube on the stove for 3-4 minutes, then make holes with quick movements. You can make 2-3 holes at a time, then heat the tube again for 15-20 seconds. Before doing this, be sure to place a board under the foam rubber so as not to spoil the floor.
Place the foam rubber on the plywood and use a pencil to mark the locations for the holes. Drill the holes with an 8mm wood drill bit.
Glue the foam to the plywood. Make sure that the holes in the foam and the plywood match.
Place a layer of padding polyester on top with a margin of 3-5 cm on each side. Lay the fabric on the padding polyester with a margin of at least 10 cm on each side. Turn the plywood over and secure the fabric with a furniture stapler on the reverse side.
Prepare your buttons. You can cover them with fabric yourself or take them to a workshop. Thread a cord at least 15 cm long into each button and tie a knot. This project required 62 buttons. Take a crochet hook and insert it into the hole from the plywood side.
From the front, on the fabric side, feel for the hook. Check the distance from the adjacent button with a ruler and make a small hole with nail scissors. Hook the lace with the button and thread it through the hole.
Pull the cord well and staple it securely to the back.
Attach the fasteners with self-tapping screws and hang them on the wall. Ready!
Upholstered headboard with a pattern of nail heads
Materials and tools:
sheet of plywood; piece of thick fabric (canvas for paintings was used in this project); nails; glue (spray glue was used in this project); synthetic polyester or batting; scissors; furniture stapler.
Progress
Cut a rectangle of the desired size from a sheet of plywood.
Place 3-4 layers of batting or padding polyester, leaving a margin of 10 cm on the sides.
Using spray adhesive, glue the first layer of batting to the plywood, then subsequent layers to the previous one.
Staple the batting to the back, keeping the material taut.
Turn the headboard right side out. Spray the surface of the batting with spray adhesive and, starting on one side, carefully roll the fabric onto the batting. Press and smooth the fabric well so that there are no bubbles, folds or distortions.
After the glue has dried, attach the canvas to the back of the plywood. Stretch the fabric well, wrap it around the frame and secure it with a furniture stapler.
Using nails you can make any ornament, including one imitating a carriage tie. For this headboard, we made a neat thin frame around the perimeter. To make one, mark two points with a pencil in adjacent corners at equal distances from the sides.
Drive the nails in there, but not all the way, but so that they stick out above the surface. Tie the string around the head of one nail, pull it tight and tie it around the second. So we made a straight line so as not to draw on light fabric with a pencil.
Then use a pencil along the line to mark places to drive in nails at equal distances from each other. Make small marks that will overlap the nail head.
Hammer the nails. Instead of nails, you can use furniture tacks.
Attach the headboard to the wall using fasteners.
How to smooth out sharp corners?
Five Basic Elements of Feng Shui
Fire is an extremely powerful element. Fiery energy bestows success in public life, brings fame, recognition and brilliant achievements to those who successfully activate it. Install candles or a fireplace in the southern part of the apartment, and they will contribute to your career.
Water is the energy of wealth. A fountain or bowl of water in the northern part of your home will help your prosperity.
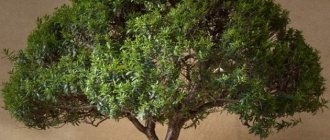
Earth is fundamental energy. Connecting to it brings harmony and great family happiness. The earth element dominates the southwest, northeast and central sector of the house. The best symbol is the globe. The tree brings growth, expansion and advancement in the material plane. Its energy imparts good luck to descendants and is especially beneficial for sons. Not every apartment can plant even a small tree, but nevertheless it is an ideal symbol. Direction - east and southeast.
Metal brings good luck to people who are influential and useful to society. A golden bell in the north-west of a home brings boundless luck.
Feng Shui (literally “wind and water”) is the practice of symbolic exploration of space. The goal is to search for favorable energy flows and use them for the benefit of humans.
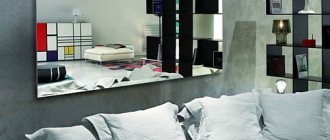
For example, according to Feng Shui, bad energy comes from sharp corners. It should not be directed towards a place where a person sleeps or sits frequently. According to Feng Shui, it is not good if the mirror is opposite a door or window. The energy does not enter the apartment, but, having been reflected, seems to jump out of it. It is also bad when there is a door to the room directly opposite the front door, and a window opposite the door to the room.
On the line between the door and the window, you cannot arrange a place for rest or work. If there is no choice, you need to divide the room into zones using a curtain made of bamboo sticks or any other material. This will also give an unusual flavor to the house.
It is not advisable for the door to the bathroom or bedroom to be visible from the entrance, otherwise others will know your secrets. Curtains will again help save the situation.
According to Feng Shui tradition, new furniture is preferable to antique furniture. Old furniture can be saturated with bad energy. This is especially true for antique beds and couches.
A sofa with a high back and armrests that provides support from the back and sides is considered excellent from a feng shui point of view. With a low back - unfavorable.
Feng Shui masters advise abandoning massive furniture with heavy carvings, the energy of which can “flood” a small house. Cabinets with crosses, rhombuses and other pointed patterns will not bring good luck either.
However, many feng shui tips are obvious to those who have never encountered this teaching. Let's say, in the kitchen, Feng Shui recommends: eliminating any damage to the kitchen stove; prevent kitchen taps from leaking; Take out the trash and wash the dishes on time; clean the refrigerator and pantry of expired food; carry out wet cleaning regularly. “Remove all unnecessary objects from the table in the study room that distract your attention from work, empty the waste paper basket, and you will see that the effectiveness of your studies will increase,” says Feng Shui. It is also difficult to argue against the fact that “a cluttered apartment affects the relationships between family members, gives rise to misunderstanding and scandalously demonstrated independence.”
— Few people insistently want everything in their apartment to be one hundred percent feng shui. But many people perceive Feng Shui on a subconscious level,” says art director of the design studio Tatyana Volkova. “For example, people are often confused by sharp corners. I recommend smoothing out the corners of cabinets and shelves with the help of plants. For example, put a flower curling downwards on the cabinet. Some people don't like cool shades. This means that a person lacks the energy of fire and wood.
DIY soft headboard with cushions, tile imitation
Materials and tools:
a large rectangular sheet of plywood for the base (in the project 150 cm by 75 cm); small plywood squares (for this project 18 pieces measuring 25 by 25 cm were needed); a piece of fabric; synthetic winterizer; furniture stapler; scissors; glue.
Progress
Prepare the plywood pieces. In large construction supermarkets, you can ask them to cut the plywood into pieces of the required size. Cut the piece of fabric into 18 squares (in your case the number may be different). The squares should have a margin of 5-10 cm on each side.
Place the plywood squares in the middle of the fabric.
Using a furniture stapler, attach the edges of one side. Be careful that the staple does not pierce all the way through the plywood and fabric. You can insert the staples at a slight angle.
Make a fold in the corner, stretch the fabric well and secure the corner with staples.
So, you have secured one side and two corners, making something like a “pocket”. Now, adding a staple on each side, fill the space between the plywood and the fabric with batting or padding polyester. Try to ensure that there is practically no filler closer to the edges, and there is a plump “slide” in the middle.
Having filled the square with padding polyester and secured the sides, secure the last remaining side and corners with staples in the same way.
Do the same for the rest of the squares. If the fabric has a pattern, try to keep it the same on all parts. You can also use different fabrics to create a multi-colored mosaic composition.
When all the squares are ready, place them on a large sheet of plywood and glue them with universal glue. Make sure the pattern is positioned correctly. Try not to have a large distance between the squares; the joints should be barely noticeable.
Protect yourself from beams and sharp corners
Hidden danger in your home may lie in beams and sharp corners that are not aimed at people. In Feng Shui, they are considered to have bad energy and are very unfavorable for those who spend a lot of time under their influence. Why are they so harmful?
Sharp corners
Although for reasons of physical safety. They are especially dangerous for young children. Hitting the edge of a table, nightstand or shelf can cause serious harm and even cause injury. In addition to the physical discomfort from the blow, one should not forget about the somatic changes in the body. A directed acute angle will lead in the future to pain in the place where it is aimed. It is known that triangular shapes cause feelings of anxiety and discomfort in the subconscious of most people. This has been formed over thousands of years of evolution. Acute forms that exist in nature are associated with danger. Danger causes anxiety, and as a result, defensive aggression to combat the threat.
Therefore, since prehistoric times, the information that sharp corners are dangerous has been firmly stored in the human subconscious. The presence of an excessive amount of them in the interior indicates external and internal aggression. Directed at a person, they lead to health problems, deterioration of relationships with others and can cause nervous exhaustion.
If they are aimed at your workplace or sleeping place, then such influence should be eliminated or at least mitigated. This can be done using special attachments, or use artificial bindweed plants.
Also, if you place the cabinet flush with an acute corner, then it forms an extension of the wall. And this is another way to neutralize the harmful effects.
The influence of beams on the feng shui of a home
Beams are special floors that are used to create multi-level ceilings. Most often, the ceiling beam is small, or we are talking about a small protrusion at the junction of the ceiling and wall. Such designs do not pose any particular problems.
But there are truly huge overhanging structures. Or a beam divides the room into parts. It is they that affect a person’s well-being, but only when they have to sleep or work under them. An overhanging structure of beams causes Qi energy to flow down, squeezing a person and attracting various adversities to him. This can lead to headaches, and in the worst case, to more serious consequences in the form of serious illnesses and financial losses.
To reduce harmful effects, use the following neutralization methods
- Suspended ceilings smooth out the negative impact of ceiling beams
- The beams can be draped with beautiful fabric. This will also decorate the interior.
- If such a ceiling is above the bed, then you can put a canopy
Apply any of the correction methods or come up with something of your own, use your imagination if you have a rich imagination.
How to choose favorable dates
How to take walks for luck
How to activate wishes
How to carry out activations at home