When a person sincerely believes in his dream and makes efforts to realize it, he can do anything. A vision board is an effective method at the intersection of psychology and magic that helps you concentrate on success in areas of interest and achieve your goals.
Feng Shui literally translated from Chinese means 'wind - water'. This is a teaching about the harmony of existence in the world. According to the theory of Feng Shui, everything around us is permeated with energy flows that affect our lives. This technique is used to create a vision board or, as it is also called, a treasure map. This is a kind of way to inform the Universe about your dreams and plans.
How does a vision board work?
Using the wish board, you send your order to the “cosmic kitchen”, where it will immediately begin to be prepared. Placing pictures in the right sectors will create the necessary harmony and attract the necessary energies.
Vision board
In addition, every time you look at images of what you want, you will subconsciously strengthen your belief that everything is completely achievable. But faith is one of the main conditions for attracting success! The thought is material.
Basic rules for a vision board
The most appropriate moment to create a vision board is a new time countdown, in other words, the beginning of something: your birthday, a few days “before” and “after,” New Year, the waxing moon, etc.
Think about what desires you will send to the “cosmic kitchen”. There is no point in asking for what you already have, or wishing for very simple things that you can easily get on your own.
Expert opinion
Melnik Dmitry
feng shui master
Desires must be expressed in an affirmative form. You cannot use the particle “not”! In the “cosmic kitchen” it will not be heard, and the effect will be the opposite.
How can you replace a regular wish book?
It is not necessary to follow the traditions of the West; you can come up with your own version of greetings, which will look no less attractive and original.
Wooden tiles
You can buy or make wooden tiles of different shapes in advance, you can make them round or square, and on the day of the celebration, instruct people to depict your parting words on them.
Afterwards, the wooden tiles are collected and placed in a large transparent vase or placed under glass in the form of a picture; such decor can be hung in the home of the newlyweds, it will delight them and remind them of a happy and special day.
Blanket of Wishes
Also an original way to capture pleasant memories from the celebration, you need to purchase a blanket in advance, preferably one with a square print on it, plus you need to buy permanent markers.
On the day of celebration, you should spread out a blanket and ask all those invited to write their kind and warm words.
The only negative is that you cannot cover yourself with a blanket every day, since the inscriptions will still be erased over time. To maintain the appearance and lettering, sometimes the blanket needs to be taken to the dry cleaner.
Fingerprints
To do this, the couple should prepare a Whatman paper in advance, on which will be a drawing of the newlyweds holding a ball or a tree.
Afterwards, everyone is asked to write down their thoughts. It is necessary to prepare soaked pads with paint so that each invitee can paint his finger and make an imprint, complementing the picture depicted.
Wedding letters of your names
Very often, newlyweds order the first letters of their names or the inscription “LOVE”; at the end of the day, you can leave an autograph from each person or ask them to write a few affectionate words.
This way, the decor will not only complement the room in the future, but also bring back memories.
Globe and map
Another original way is to let the guests write congratulations; you can buy a globe or a world map, on which you need to mark the most important places for the couple.
Afterwards, in the free seats, each invited guest will be able to express his parting words in writing.
Photo album of wishes
Making a photo album of congratulations is very simple, you should buy a photo album where you can leave notes under the photos, then at the wedding you should take a photo with each person and ask him to leave kind words dedicated to the newlyweds.
After the celebration, you need to paste all the photos.
Paper hearts
A very simple and inexpensive way, for this you need to take a large frame and place hearts of the same format at the same distance on it.
Afterwards, at the gala event, everyone will leave their congratulations.
Wedding wish tree
Leaves can be hung on a real tree using ropes or ribbons; in the same way, they can be hung on a decorative tree.
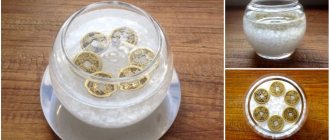
Wedding wish jar
You need to prepare a jar or any other transparent container in advance; you also need to prepare leaves of the same volume, but of different colors, so that they look harmonious in the jar.
Each person leaves his congratulations, then twists the leaf, ties it with ribbon or thread and throws it into the jar.
You can open the jar and read it for any anniversary.
Wishes feed
To do this, you need to take a rope or ribbon and attach small multi-colored or plain leaves to it using clothespins, on which guests will write.
Wine bottle
To do this, a wine bottle is decorated before the event to match the style of the wedding, after which people are invited to express their good thoughts on small notes prepared in advance.
Each invitee writes a note and throws it into a bottle, which will stand in a prominent place for the young people, and for nostalgia, you can re-read all the kind words left.
Wish board
You can purchase a regular drawing board and ask all participants in the celebration to leave a note, drawing or autograph on it.
The downside is that what is written is very easy to erase, and over time the chalk may crumble on its own.
Wishing stones
The couple should collect a lot of pebbles in advance, preferably pebbles, it is convenient to write on them, then they need to put two containers at the celebration, one should contain pebbles without an inscription, and in the second the guests will put pebbles on which a kind word is written.
It is most convenient to write on pebbles with special felt-tip pens, which can be bought in craft stores.
Envelopes with wishes
You can make it yourself or buy miniature envelopes, then the invitees will write all the words and put a note in the envelope, and sign the envelope itself.
Next, all the collected envelopes are collected in a transparent container, so that they look more impressive and harmonious, it is better to use several colors of envelopes.
Letters with wishes
You can ask each guest to write a mini letter, which he will then put either in a stylized cage or in a chest in which all the notes will be stored. Each letter sheet can be made with the couple's initials.
Group photo
To do this, in the morning you need to take a photo of the newlyweds together with all the guests, and in the evening the photo is inserted into a frame and everyone leaves their own inscription on its back.
Art wish
For it you need to purchase canvas, paints and brushes at the event. It is necessary that everyone draws a picture, after which you can hang the picture in your room, it will delight the newlyweds every day.
Bundle of wishes
To make beautiful bundles, you need to take forms of the same size, preferably in different shades, and after writing, place them in a frame prepared in advance, which, instead of a dense middle, has a stretched mesh into which the leaves are inserted.
Vase of wishes
To do this, you should purchase a large vase and waterproof markers; on the day of the celebration, each guest leaves his autograph on it. The vase will decorate the newlyweds’ room for a long time.
How to make a vision board with your own hands?
Making a vision board is easy. But you need to choose the right moment: when you are not in a hurry and are in a good mood. If your mood is not good, you are tense and everything around you is bad, your efforts will be wasted: the treasure map will not work.
Preparation and necessary materials
Typically, whatman paper or cardboard is used to create a vision board. You can also purchase a cork board at a hobby store. It all depends on your imagination and preferences, the main thing is that, first of all, you like the design of the vision board.
Schematic representation of a vision board
The space of whatman paper or cork board is divided into nine sectors, which represent one or another area of life. In each of them you need to place a photograph or picture that is associated for you with achieving success in this area. Suitable images can be found on the Internet and printed on a printer, or cut out from magazines and glued to whatman paper. In the central sector you need to place a photo of yourself - one where you are happy, radiating self-confidence and success.
After your wish comes true, you need to carefully remove the picture from the corresponding sector and attach a new one in its place.
Optimal design option
Sectors on whatman paper should be presented as follows:
| Wealth, prosperity, money | Fame, self-realization, calling | Love, marriage |
| Family | Health, your photo | Creativity, children |
| Knowledge, wisdom | Career | Travel, assistants |
By arranging the sectors as shown above and decorating them with the desired color, you will attract energies to speed up the process of realizing your desires.
Each sector has its own colors and symbols:
- For the Wealth sector, it is recommended to choose purple. Pictures include images of money, precious stones and metals, attributes of a luxurious life - cars, mansions, penthouses, etc. If it is easier for you to perceive text rather than an image, add a few words describing your vision of success. And of course, do not forget to indicate the period by which you expect to get rich.
- The Glory sector is colored red. Here you can place photographs of diplomas, cups, certificates of honor, and other prizes or awards that you would like to receive. You can use Photoshop to add yourself to the photo where someone is being awarded a prestigious award.
- The love sector requires decoration in pink. Symbols of romantic relationships are perfect for him: hearts, flowers, kisses. If you don't have a loved one in your life at the moment, you don't need to place photos of celebrities that awe you in this sector. This may attract a similar-looking personality to you that is completely unsuitable for you. It is better to add a few words describing the qualities of the future chosen one.
- The family sector is decorated in green. By placing your family photos there, you begin to claim a happy and conflict-free life in harmony with the world around you. You can attach a picture of your ideal family and add a few lines describing the relationship.
- Center board with your photo. The best color for decorating this sector is orange or yellow. In the photo you should like yourself and be in a good mood. If you plan to change in the near future (for example, lose weight), you can resort to the help of Photoshop, editing the photo to enhance the effect.
- The creativity and children's sector should be white. If you are already a parent, attach here a photo of your child, healthy and happy, and add a few life-affirming words. If you are planning a child in the future, feel free to take photos from the Internet in which the children look happy and you like them. Creative people are encouraged to add photographs that reflect the area of activity that interests them.
- Knowledge sector, blue color. Symbols that reflect the acquisition of new knowledge, for example, an academic cap or a book, are suitable for design. You can make a diploma in Photoshop from the institution where you would like to study. Of course, with your first and last name.
- The career sector is designed in black. A personal account that you would like to have, or a salary amount written in your hand, would be suitable as an image. You can draw a career ladder and indicate at each step the stages of growth and time period.
- Travel and assistants. It is recommended to use gray color to decorate this sector. Here you can post images of places you would like to visit, sights you dream of seeing, etc. Spiritual mentors whose views have always been close to you and gave you strength to move on can act as assistants.
Feng Shui visualization map
What does this magical, notorious object look like, and how to make it correctly?
It must be borne in mind that this is not just a card that fulfills secret plans, it is a poster of desires according to the principles of the science of Feng Shui, and the approach to it comes from these positions. First, you need to stock up on a large sheet of thick paper or cardboard, pencils, felt-tip pens, clippings from magazines or photos, glue, tape to make a map carefully, everything that will help in creative work with a collage.
Further, whatman paper is divided into 9 sectors, according to the Ba Gua grid, where the central part, health, is allocated to the photo of the one who decided to make a poster of desires - he wanted tangible changes. The face should shine with a smile, reflect real happiness, and each zone should be painted, according to Feng Shui, in a supporting color.
The southeast is responsible for wealth and prosperity, has green color and shades.
The south is the reputation, the opinion of the people around you, and is subject to the color red.
The southwest oversees love and marriage. It turns brown.
East - family and office team. Green color.
The West is responsible for hobbies, children and creativity. Painted white.
Northeast - wisdom, improvement of capabilities, painted light brown.
North - career, work, realization of abilities. Supporting shades are blue and dark blue.
The North-West is responsible for travel, as well as help and protection - real and from above. The sector is colored gray.
The palette should be positioned as indicated above.
Activation and placement of the vision board
The finished vision board needs to be activated. To do this, some very simple desire is written down on it, for example, going to the movies or buying a new dress. In a word, something that is easy to implement.
Where to place the vision board is up to everyone to decide for themselves. Some people feel more comfortable when their desires are hidden from the casual glances of others, and they stick the card to the inside wall of the closet. Some people prefer to hang it above the bed so that every morning begins with concentration on a dream. Some feng shui experts say that a vision board will only work if it is placed on the west wall of the room.
But in reality, it doesn't really matter where the treasure map hangs. It is much more important that your wishes come from a pure heart, and that you firmly believe that they will definitely come true.
Book of wishes using scrapbooking technique
This technique is very easy to work with, we will provide a step-by-step master class, depending on your preferences, you can change some nuances to suit your partner.
To make it you will need:
- Whatman paper 2 pcs;
- cardboard;
- A4 sheets;
- colored and crinkled paper for interior pages;
- lace, ribbons, beads and other decorative elements;
- figured hole punch;
- scissors, ruler;
- glue;
- scotch.
After the pair is determined with a color scheme and style, you can begin the actual production.
- It is necessary to cut a sheet of cardboard of the selected format.
- The selected format is cut out of the crumpled paper, but a few centimeters more on all sides so that the page can be wrapped in cardboard.
- You need to wrap the cardboard with crumpled paper and secure it with glue.
- Using a hole punch, we make holes, thanks to which the diary will be easy and convenient to leaf through; rings are inserted into them.
- It is advisable to decorate the cover with different elements; you should not follow any requirements; you should stick on those elements that will highlight your individuality.
- To make it denser, you can attach thick decorative paper to the back side using double-sided tape.
- To create a masterpiece, use not only light colors, add zest with some dark elements.
- Everyone chooses their own name.
- The inner pages are made slightly smaller than the cover, they need to be done in the same style, there should be as many pages as there are invited people, additional sheets are also added, in case someone writes a very long congratulation.
- Then on the first page you can sign the names of the newlyweds.
- If all the pages are ready, they can be assembled - on the cover, in the place where the holes are made, you need to install eyelets, thanks to which the pages will turn easily and not tear.