What is a rosary?
Rosaries are ribbons or dense threads closed in a circle with knots tied on them, various beads, or decorated with other decorative or ecclesiastical elements. Used in various religions, for example, Christianity, Islam, Buddhism. The name itself comes from the word “count” (“honor”), that is, to make some kind of calculation. Most often they are a dense cord on which beads are strung and a cross is attached.
Origin story
The most ancient mentions of rosaries go back to the 2nd millennium. India is considered the birthplace of origin. In Christianity, it is very difficult to find out the specific date of their appearance. Not a single church book of early times, especially the Bible, contains any words about rosaries. Neither what they are nor what they were used for at that time. From this we can make a presumptive conclusion that in early Christianity there was no such attribute at all.
The appearance of rosaries in Christianity is associated with Anthony of Egypt and Pachomius the Great. Their students were not always educated; many could not even write or read properly. But they studied church work. In order for Pachomius' students to remember the prayer (Address to Jesus), he forced his students to repeat these lines a certain number of times every day. But since his students thought poorly, they were given a rope. After each time the prayer was read, the students tied one knot in their rope.
In addition to this version, there are also thoughts that the appearance of the rosary is associated with Basil the Great, who lived in Caesarea. Before he passed away, he left a will in which he mentioned the sacred rope, the meaning and significance of which must be respected.
We weave an Athonite cross from soutache
We will need soutache cut into 4 sections of 15-20 cm.
If we want the cross to have a small loop, we need to make one of the sections a little longer (as shown in the picture). Fold the 2 pieces exactly in half.
We hold it by the center, fold the ends one on top of the other one at a time, and insert the third into the eyelet formed by the first end.
Tighten tightly to form an even square.
We repeat the same several times until we have a short column.
From the other two segments we make the same column, but without a loop.
We apply one to the other and tie it to the sides in the same way, using 2 ends from the top and 2 from the bottom posts.
Place a bead on a pin and insert it into the bottom column.
When we have woven the columns on both sides, we cut off the remaining tails with wire cutters, leaving small pieces.
We melt these remains with fire (the soutache is baked, forming a solid clot).
We delight our friends and family with an original cross with a centuries-old history.
And, by the way, it wouldn’t hurt to think about making things with a good mood, so that not all the anger and rage (like Tolkien), but all the love and goodness are put into the product being manufactured. Creative success.
Source
Purpose of the rosary
The main purpose is connected with the church, since the rosary is a church attribute. This meaning lies in the fact that they serve to count the prayers read. In order not to get confused during the service or ordinary daily prayer, rosaries were and are used. The number of beads or knots on them is the required number of prayers to read. Even Basil the Great pointed out that the rosary serves to pray to God himself. The monks have an unusual name - “spiritual sword”. The main prayer is the Jesus Prayer.
Peculiarities
The rosary has many interesting and important features that reflect some parts of the historical and religious part of this church attribute. Among the main features are:
- An object that will be located at the very end of the rosary. This item will reflect the canons of religion. In Orthodoxy, a tassel and a small cross will be attached to the end. In Catholicism it will only be a cross. In Buddhism, these are also tassels alternating in a certain order with beads. In Islam, there is a stone at the end of the rosary. And among the Old Believers, on their rosary you can see a triangle, which symbolizes the Holy Trinity.
- Symbols. If you know the purpose of each symbol, you can better understand the essence of religion. In Christianity it is the mystical garden of the Mother of God, in Buddhism it is the wheel of Samsara, in Hinduism it is the cyclical nature of time.
- Number of beads. In Buddhism this number will reach 108, since there were 108 Brahmins. In Christianity there will be from 10 to 160 beads. In Hinduism there are 32, 64 or 108. In Islam, the number of beads will be 99: they are divided into links, a total of 3 links of 33 beads each.
Design
You need to know the design in order to properly learn how to weave rosaries. In this matter, three main components can be distinguished.
- A thread, knot or cord serves as the basis for the entire product. Beads and other attributes are strung on a thread, and knots are also tied. Those who adhere to Tantric Buddhism generally create a thread from 5 different colors at once (blue, white, red, green, yellow), these colors represent five different elements (fire, water, space, air and earth).
- Various separating elements. This is most often used to separate a certain number of beads from each other.
- Pendants. These include religious crosses, pebbles and tassels. You can also use larger beads as pendants. Or beads that differ in color from the rest.
The technology of weaving rosaries (a knot on two threads of soutache)
Usually rosaries are woven from soutache, woolen threads or various types of cords. To make 10 knots, approximately 80 cm to 110 cm of material is required, depending on the thickness of the thread. The pictures below show the weaving sequence. To learn and acquire the skill of weaving, it is advisable to choose two cords of different colors. In addition, the work will require beads that differ in size from the completed knots to separate dozens of knots from each other.
Description of the whole process:
You measure the soutache 5.5 meters, if you need a rosary for 50 knots, for example, if for 100, then 11 m, usually I measure from the shoulder of the left hand and to the right to the end of the right hand.
Then I fold this soutache thread in half, cut the thread, then in half again, so that there is a middle; I tie it into a loop and twist half with 2 soutache threads, so as not to interfere with the weaving on the other side, i.e. I weave from the middle of the rosary, it’s more convenient for me :).
The edges of the threads can also be twisted so that they do not interfere with weaving.
The knots are usually woven on the left hand. Weave 10 knots, string a wooden bead, you can drill the hole deeper with nail scissors and push the soutache through using a not too large gypsy needle.
When 25 knots are woven, note: 5 knots are woven from the middle and then a bead, and to the end in dozens. After 25 knots are ready, unwind the second half and remove the loop, continuing to weave 5 knots in the middle on the other side, so that there are 10, then a bead and tens.
The finished rosary is woven at the bottom, i.e. a knot is woven from 4 threads of soutache at the ends, then a cross and a tassel are attached. This is a separate operation and the cross is woven according to your imagination.
I usually weave the crossbar separately from knots and pass it through the remaining threads that held the rosary together, then I then weave 2 knots at the end of 4 threads, wrap a strong thread around the entire cross with the crossbar, and attach the tassel to the last knot of 4 threads.
P.S. The cross can be woven from the remaining soutache threads, which should not be cut off when you have connected the finished rosary!
First, you will get a knot from 4 threads of soutache, then weave a small knot from two threads of soutache and before tightening it inside, pass the remaining two threads and then tighten, then make a distance of about 4 cm or as you want less or more, the same weave a small knot from two threads of soutache and pass the remaining two threads of soutache inside.
A crossbar is woven separately on two threads of soutache about 3 cm long so that there are knots along the edges like in a rosary, the excess soutache is cut off after the knots, you get a ring inside if you expand it.
After that, the spangled distance of the rosary is threaded inside the crossbar and you can insert a match or 1 small nail without a head into the middle of the soutache vertically and wrap the cross with the strung crossbar with simple threads, giving it a shape, this is what I do, for me this is a simple and beautiful option. This means that after you have made a cross from knots, you should have 4 more threads left and from them you add 2 knots below the cross into four threads of soutache, they will be large, just like in the place where you connected the rosary, if you weaved from the middle.
Between two large knots, you separately cut the soutache about 10-15 cm in length, 10 pieces or more (you can wrap the soutache around a small book of prayer and cut it on both sides) and cover the cross with it so that in the middle of the covered soutache you can tie the soutache with ordinary threads threads between two large knots.
Then you lower the soutache threads from the cross down, it turns out that the threads will be on top of one large knot of the second, i.e. the last one and wrap the tassel on top with ordinary threads, which turned out to be attached to the knot.
Then you cut off the excess threads so that the brush is the right size. The cross is also woven from 4 threads of soutache “cross to cross”; each thread is overlapped in turn and the crossbar is also made separately, but the knots at the edges are usually woven first. I also made a cross from beads, i.e. When I connected the rosary, I strung a bead. Then I separately made a crossbar from knots along the edges and beads on one side and the other with a distance and passed the bottom of the rosary through the crossbar.
Next, I strung 2 beads and wove two large knots from the 4 soutache remaining from the rosary in order to attach a brush between them.
I also usually made a brush from woolen threads for soutache rosaries, in the monastery the monks say that demons are afraid of wool (the same effect of a hair shirt on a naked body in ancient times reminds them, and some monks beat themselves with woolen rosaries or whips).
It’s good to sprinkle with holy water with this brush. The meaning of the rosary is different.
| Categories: | Films, videos Creativity Orthodox Christianity |
Necessary materials
In order to weave a rosary with your own hands, you need to prepare all the materials necessary for this.
- A thread. It is best to use a thick thread or cord that will not break. Sometimes they even use elastic bands, thanks to which the product can stretch.
- Beads. It’s worth looking at them in more detail, because they can be made from a variety of materials. Rosaries are made from the following types of beads: bread, glass, ebonite, polymer clay, wood. If weaving rosaries is new to you, then it is better to use the most ordinary beads. It is necessary to choose a color and size.
- Attributes: crosses, pebbles, tassels.
- Pins – These will help when stringing beads onto your base.
- Scissors.
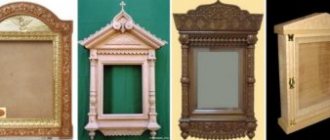
Orthodox rosary
How can you make Orthodox rosaries with your own hands? To assemble a product intended for counting prayers and bows during the service, you will need not only thread and beads, but also a cross with Christ’s crucifix. This is exactly what a traditional Orthodox attribute looks like. It is optimal to use pine as a material for creating beads, since it is best processed.
To make an accessory you will need a fairly serious set of tools and materials, namely:
- thick fishing line;
- mini drill;
- polishing paper;
- wooden blanks;
- alkyd varnish;
- stain.
The process of making wooden rosaries:
- First of all, a wooden block is marked to cut out elements of the same size;
- It is then cut into miniature cubes;
- Using a mini-drill, a through hole is made in each element exactly in the center;
- After this, each bead is cut using a file and sandpaper;
- To give the product a beautiful color, it is advisable to cover the cubes with stain and varnish;
- Next, the dried balls and crosses are strung on a fishing line;
- In order for the rosary to be assorted, it is advisable to leave a small distance between the balls.
Step-by-step instruction
How is Orthodox rosary weaving done? For production you will need:
- stone beads;
- metal beads;
- chain;
- cross;
- dense thread;
- separators (aka caps for beads);
- pins;
- water;
- scissors.
If desired, you can also use glue. It will take you from one to two hours to create such rosaries. Next you need to follow the instructions provided:
- Take exactly 33 beads. This number is used in Christianity, as it is associated with the life span of Christ on Earth. You can take another quantity, but it must be a multiple of twelve or ten. You use 30 beads mainly in a circle, and the remaining three to create the so-called “tail”, on which you also place a cross.
- Since the beads are made of such a difficult material as stone, you need to lower them into a bowl of water, and then use an awl to slightly widen the holes in them. Remove all sharp corners. It is desirable that these holes for all beads be equal in size.
- The stage of assembling the rosary. Take a thick thread and place one metal bead on it. Then, after the bead, place a chain with a cross on it.
- Thick thread needs to be threaded into a metal bead. Thus, you should get a loop, and the cross will be a separate element attached to the rosary. Tie a strong knot. You can pour glue on it to make the product stronger and not fall apart. Cut off any excess.
- Weaving a rosary requires attention and concentration, so you need to carefully monitor the number of beads used. Next you just need to string the stone beads. They can be separated using separators of 11 beads, for example. Here, everyone’s personal desire is more important. The end result can be secured with bead caps. Also secure everything with glue.
- The beads must have room to move freely along the cord or thread. To do this, leave 1-2 cm between each wooden bead.
- All threaded beads need to be secured again by tying a knot, then put on another metal bead. An important point follows - the thread is threaded into the tube, after which the entire product is again secured with a knot.
- The rosary has already acquired its final form. You just need to tie a couple more strong knots. Your Orthodox rosary is ready. Weaving did not turn out to be difficult, but it did require time and attention.
How to make a rosary with your own hands. Author MK Svetlana
How to make a rosary with your own hands. Author MK Svetlana
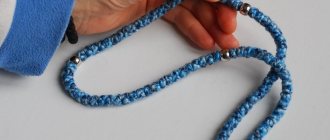
I bring to your attention a step-by-step master class on making Orthodox rosary beads with a cross.
Orthodox rosaries can have a different number of beads, but most often they use rosaries with 33 beads, according to the number of earthly years of Christ’s life, or a multiple of 10 or 12. Rosary beads are used to count prayers recited.
I suggest you assemble a rosary from 33 stone beads. 30 beads will be arranged in a circle, the “tail” will be made of 3 beads and a cross.
We will need:
2. Stone beads - 33 pieces with a diameter of 10 mm (the most optimal size of beads with a diameter of 8 mm-12 mm).
3. Silk thread 0.6 mm thick (in rosaries it is best to use silk thread 0.6 mm-0.8 mm, jewelry cable is not suitable).
4. 8 round metal beads with a diameter of 3 mm and one tube bead 2 mm x 3 mm, two caps for beads, a chain of 3 cm.
5. Diamond-coated hole expander.
First step. Let's prepare the stones for work.
Using an expander, you need to process the holes of the stones, smooth out all burrs and roughness.
To do this, soak the bead and expander in water.
Place the bead on the expander and rotate. The stone must be turned slowly, without force, so that it does not crack.
The holes should be equally level for all stones.
Such a pebble cannot be used!
Second step. Let's start assembling the rosary.
We string a metal bead and a chain with a cross onto a silk thread.
We stretch the silk thread into the hole of the bead.
Basic mistakes
Weaving rosaries, although it seems simple, is also accompanied by many mistakes. Especially for beginners.
- Some wear a rosary bracelet on their arm. How to weave these correctly? It's simple. Weaving occurs as with ordinary rosaries, but many do not take into account the fact that difficulties may arise when putting such a bracelet on a hand. If you use regular thread, it will not stretch. Many people make the mistake that when making a bracelet in the form of a rosary, beginners use a regular thread or cord. In this case, you need a thick elastic band. This way you will get a nice rosary bracelet for your hand. How to weave? This question will no longer seem so scary.
- Using too bright colors. We must not forget that rosary beads are a church and religious attribute. It is better to approach the making of rosaries intelligently, without using too bright color combinations.
- The cross and tassel must correspond to the size of the future rosary. If you take them too large, the rosary will be bulky and sloppy.
- Many beginners buy untreated stone beads. This is a mistake, since it will be quite difficult to bring them to the proper form on your own.
Making Tips
After you have learned about the main mistakes when weaving rosaries, you should familiarize yourself with important tips. Some of them are presented below.
- If you decide to use 4-strand rosary weaving, then you should choose small beads so that the final version does not look huge. The optimal size would be 5-6 millimeters.
- Some people prefer to weave a cross from rosary threads with their own hands. To do this, professionals advise using 4 silk ribbons, each 1 m long. The type of weaving does not matter.
- If you want to make a rosary from a material such as plexiglass, then craftsmen advise buying it whole at various construction markets. There the material is cheaper, and there is enough of it for several products at once.
- Most often, beginners make Orthodox rosaries with their own hands. Weaving them from beads is not so difficult, since the amount of symbolism is much less than in the rosary of other religions. Here, beginners are advised to adhere to the rule: the simpler, the better. Making rosaries from complex materials takes much more effort, time and material resources than weaving the most ordinary Orthodox rosary, for example, from wooden beads.
Bread product
How to make a rosary from bread? This may seem very strange to some, but such structures can be easily made even from ordinary bread.
To do this you will need the following set of products:
- granulated sugar;
- crumb of bread made from third grade flour;
- strong thread.
There are two methods for creating bread products, from which you can choose the best one for yourself.
To make a rosary using the first method, you need to follow the following sequence:
- Add granulated sugar to the bread crumb. This is done so that the links do not crack over time;
- Then the bread is kneaded with your hands. After about an hour, it will turn into a pliable mass, making it easier to work with;
- Divide the plastic mass into several parts and form small balls of the same size;
- Before the links harden, thread them onto the thread.
In fact, the whole process will take you no more than an hour and a half, but the product will be short-lived.
In this sense, the second method of creating an accessory is much preferable:
- The first step is to add granulated sugar to the bread;
- Then pour boiling water over it;
- The resulting mixture is left for about 30 minutes;
- After this, the bread is rubbed either through a very fine sieve or through cheesecloth;
- When the mixture dries a little, the bread will turn into a pliable and plastic mass;
- Next, as in the first method, balls are formed and strung on a strong thread.
Price
Making rosaries is a fairly inexpensive activity in material terms. Of course, it all depends on the materials chosen. If the price of ordinary wooden beads ranges from 50-100 rubles, depending on the quantity, the price of a plexiglass rosary will be much higher. The plexiglass itself in a hardware store will cost at least 500 rubles, not counting consumables such as tapes, threads and other paraphernalia.
Weaving rosaries from soutache will cost more than from ordinary wooden beads. Soutache is used instead of thread, and its cost will be about 60 rubles per 20 meters. But this does not count the beads that you will also use.
Plexiglas product
The entire process of making jewelry is rightfully considered a real art, because the author of the creation can use a huge number of techniques that will allow him to create his own small masterpiece. How to make a rosary from plexiglass?
For this you will need the following materials:
- plexiglass;
- hacksaw for metal;
- nylon thread;
- needle;
- dyes (fucorcin, iodine, brilliant green, blue).
Braiding a pigtail in this case is completely unnecessary if you don’t know how to do it. It will be enough to string the beads on a nylon thread. True, the process of manufacturing the product itself is quite labor-intensive, since you have to deal with small parts.
Manufacturing process:
- Using a hacksaw, cut out the required number of beads of the same size from a sheet of plexiglass;
- The size of all links should not exceed 1×2 cm;
- It is advisable to make the outer beads a little larger than the rest if the rosary needs to be made reversible;
- The total number of all links can be easily determined by the size of the palm;
- Then, in the center of each bead, you need to carefully drill through holes;
- Using a regular needle, thread all the links onto a nylon thread;
- To obtain a creative multi-colored accessory, all links can be painted in different colors using regular iodine, blue and other coloring materials.
Reviews from masters
It is very easy to understand many of the nuances in performing any job. You just need to carefully read the reviews of professional masters or similar beginners. This way you can avoid many errors. Judging by the reviews, weaving rosaries is a calming activity, and it takes relatively little money. After people try to weave rosaries from soutache, they subsequently use only it, since it is very durable and comfortable. Some people use wooden beads as their first experience in weaving rosaries. They say it turns out beautifully and is easy to use.