An icon case is a special design for an icon, which in appearance resembles a wooden box. It is designed to protect the image from mechanical influences, changes in temperature and humidity, drafts, candle soot and other negative factors. Properly created conditions make it possible to preserve the icon for many years, make it a family heirloom, and pass it on to inheritance.
In addition, a carved wooden icon will fit perfectly into any interior and decorate a temple, chapel, or home.
Where can I get an icon case? There are several options: the simplest and most convenient is to order its production from specialists or buy a ready-made version. More labor-intensive, but economical - to do it yourself.
If you are not looking for easy ways and have golden hands, then choose the second option. In this article we will tell you how to make the simplest icon case with your own hands.
How to make a homemade icon case with your own hands
An icon case can be made at home, as it has a fairly simple design. In essence, it is a simple wooden box with a front wall made of transparent material - glass.
Floor icon case
In order to make a good icon case, it is recommended to take measurements and make a drawing. According to the existing drawing, a frame is made from boards.
Attention! To make an icon case, it is recommended to use pine, birch or oak. The glued and dried frame is treated with sandpaper
The front door of the icon case consists of a frame and glass. The frame is attached to the frame of the icon case using fittings, the glass is fixed with sealant. At the final stage, the icon case is varnished or treated with stain
The glued and dried frame is treated with sandpaper. The front door of the icon case consists of a frame and glass. The frame is attached to the frame of the icon case using fittings, the glass is fixed with sealant. At the final stage, the icon case is varnished or treated with stain.
What do you need to know to make an icon case at home?
An icon case for an icon can be made at home. It's not as difficult as it seems at first glance. To do this, you need to stock up on wooden boards, carpentry tools, glass and fittings. You also need to purchase stain, varnish and paint. First of all, you need to decide for which icon the icon case will be made, and where it will be installed. The lighting of the location of the icon case should also be taken into account. Based on all this, you need to choose a future color shade to frame the image. You also need to clarify what kind of shrine the shrine will be, floor or tabletop. Another important point is the number of images that will be placed in the icon case.
Icons for icons, buy in Moscow
From us you can buy an icon case not only in Moscow, but also order an icon case with delivery to any region of Russia, as well as near and far abroad. We offer to purchase both simple, inexpensive icon cases and complex carved icon cases made of valuable wood, which in themselves are independent works of art. Icons are made from different types of wood and are complemented with decorative elements (gilding, embossing, carving). We offer two types of icon cases, which differ in the way the icon case is opened: “Pencil case” – (the back wall of the icon case is pulled out according to the “pencil case” principle). “Book” (the back and front of the icon case opens like a “book”, while these parts are connected by loops on one side and a clasp on the other).
Icon “book”
Oak icon cases with a simple frame
Oak icon cases with gold frame
Oak icon cases with gold frame and rounded corners
Oak icon cases with a simple frame, rounded corners and a carved crown
Oak icon case with a simple frame and carved crown
Oak icon case with baguette frame and rounded corners Oak icon case with carved frame
Icons with basma
Icons purchased in our workshop are made by hand in compliance with centuries-old traditions and have a lifetime guarantee if stored with care.
Make it yourself or buy ready-made?
As you can see, it is possible to make an icon case with your own hands, but it is quite difficult and will take a lot of time and effort. However, no one guarantees a positive result. Moreover, if you want to get a truly reliable, beautiful and high-quality icon case, it is better to entrust such delicate work to professionals.
In our workshop you can buy a ready-made icon case, or order its production according to your sizes and requirements. You are guaranteed to receive an excellent product of the highest quality made from solid wood or MDF.
Our company has been specializing in the production of carved products for more than 10 years, including religious ones: icons, icon cases, iconostases (including small iconostases for the home), religious panels, special shelves for storing icons, etc. We cooperate with many churches and temples. Call! You can trust us!
In the photo: icon cases made by our specialists.
Correct design
An icon case is not only a decoration; its main function is to protect fragile paintings from external influences and preserve them for many years. Therefore, it is necessary to carefully approach the choice of materials and shape.
At first glance, the simple design has a number of mandatory rules for manufacturing.
- Each icon case is made for a specific icon. Measurements are carefully taken and fastenings are made exactly according to them.
- To ensure that the image is tightly fixed inside, wooden blocks, cardboard or thick paper are additionally used.
- When using a glass frame, there must be a distance from the glass to the image.
- For the outer door, it is better to use glass rather than plastic. This way the box will last longer.
This is interesting: Kolivo (kutya) in Orthodoxy - the meaning of the dish and its recipe
Kyoto: to be or not to be?
Do you doubt whether you need an icon case? Then think about how you will regret it in a few years if the family heirloom is not preserved due to laziness or unwillingness to spend a sum of money. In addition, it is determined not only by the money spent on its purchase, but also by the feelings and memories with which the image is associated. Moreover, you now know how to make an icon case.
Not sure if you can handle making your own icon case? Then go to the store. In any case, it is advisable to install an icon case: then your icons will be protected from the influence of negative factors. Good luck!
An icon case is not just a decoration for an icon. It has an ancient history and carries a semantic and functional load. Even in ancient times, representatives of different religions used icon cases to store all kinds of relics and scrolls. They protected objects from dust and moisture, thereby extending their life. Today, an icon case is a frame of icons that can be seen in a church temple. A special atmosphere is created inside it, which prevents any negative impact of the environment on the sacred image. In addition, one look at such a handmade masterpiece as an icon case awakens respect not only for religion, but also for the skillful hands of man, his ingenuity, skill, imagination and spirituality.
A little history
Initially, icon cases were created not to store images of saints, but to store other things. Jews preserved sacred books in them, Christians preserved the relics of saints.
Such storage became most popular during the Middle Ages. At this time, only icons began to be stored in boxes.
Ancient products corresponded to the architecture of the sanctuary in which they were located.
Expert opinion Sidorenko Alexander Antiques appraiser, numismatist
Now icon cases are an integral part of the temple, as well as works of art. Anyone can buy a product according to their desires and capabilities.
Well, new technologies have done their job. Now you can purchase the creation not only in churches, but also on the Internet, but the cost will be higher.
The first stage of making the icon case
To make an icon case with your own hands, you need to measure the dimensions of the icon. Next, you need to properly design the icon case: make a drawing and put down the dimensions. After this, you can start drawing a sketch of the decorative elements. The best wood for making a shrine is considered to be pine or linden. You can use pine for the frame of the icon case, and linden for decorative carving elements. A home icon case can be made from birch, ash or fruit tree wood.
There should be an air gap between the icon itself and the glass door, which is equal to the sum of the thickness of the icon board and the protruding part of the dowels. The main thing is that this value is at least two centimeters. The keys should not rest against the walls of the icon case. A gap of one centimeter is usually left between the edge of the dowel and the wall of the shrine.
What should a proper icon case be like?
To make a high-quality and durable frame for an icon, you need to know several important nuances. The most important thing is the space between the glass and the image, which should remain after the icon is inserted into the icon case. It should be two or three centimeters. To fix the icon inside the icon case, use wooden blocks, corrugated cardboard or thick paper.
The icon case is also the protection of the icon. Therefore, to preserve the holy face for many years, glass is used, not plastic. The latter bends over time, which negatively affects the condition of the image. In addition, harmful bacteria and mold develop under the plastic, which destroys the paint.
How to make an icon with your own hands from a photograph
There are many options for transferring photo icons to a wooden surface. The easiest way is to print using a printer on a well-treated wooden surface.
But the most valuable crafts are those made by a person with his own hands. He puts his soul, skill, and energy into them.
Here are several options for applying an image from a photo to a wooden surface:
A photograph of the icon “Mother of God with a baby in her arms” is printed on a paper backing using a laser printer. Take clean plywood or a wooden plank cut to the size of the photograph.
The surface of the wood is smeared with diluted PVA glue at the rate of 3 parts glue and 1 part water. This is done so that the glue is absorbed into the wood texture.
Leave to dry for 8-10 hours. The surface should be moistened with water and the paper should be gently wiped away from the image. Varnish the image.
Some people use parchment for printing in order not to rub off the paper. The technique is the same, only after wetting the parchment comes off completely as a sheet, leaving the image on the wood.
You can stick photos printed on paper to a hard surface. There are a lot of options.
Design and features
An icon case is a small, lightweight box designed to store an icon and protect it from the influence of negative factors - dampness, sunlight, acid vapors, etc. Wall-mounted icon cases, for example, a small analogue icon case, are designed for storing icons at home. Such devices are similar to opening or blind boxes, for the manufacture of which materials such as wood, glass and plastic can be used. At the same time, an icon placed in an icon case must be ventilated, so such a case a priori cannot be sealed (this would contribute to the appearance of mold and oxides on the surface of the icon).
At the same time, the icon case cannot be called an ordinary box, and all because a special microclimate is created inside it, protecting the icon from dirt, dust, soot, acid fumes, etc. In the cavity of the icon case, the icon is fixed using blocks of wood, corrugated cardboard or high density paper. If the dimensions of the icon do not correspond to the dimensions of the icon case, then under no circumstances should its parameters be artificially adjusted by cutting, etc. Such actions can lead to damage to the icon. It is also not recommended to allow the surface of the icon to come into close contact with the glass of the icon case, since there must be air space between the two surfaces.
An icon case that provides suitable conditions for storing icons at home must meet the following requirements:
- when inserting an icon into an icon case, the distance from its surface to the glass of the icon case should be 2-3 centimeters;
- the keys of the icon board, which protect it from deformation, should not rest against the walls of the box for storing them;
- the gap between the key and the side wall should be at least one centimeter;
- if the icon is painted on canvas, then the distance from its surface to the glass should be no more than five millimeters.
Wall icon case
In churches, portable icon cases, which are usually large in size, are used to store icons. Also on sale you can find devices for storing icons, which are decorated with decorative elements - carvings, artificial stones, etc.
What does it look like?
An icon case is a case into which the icon is inserted. Products can be wall-mounted, corner-mounted, or floor-mounted. Icons are designed to preserve images of saints from the destructive effects of environmental factors: temperature changes, light radiation, dust, dirt, bacteria. And also inside the icon case a favorable microclimate is created for the image. Therefore, you cannot call it just a box.
Kyoto
Icons for the home most often represent an opening and closing cabinet. Wall products are also homemade.
The image is attached using small blocks of wood. Sometimes the sizes may not match. You cannot file down the edges of the icon in order to insert it into the product. The image should be stored in an icon case corresponding to its size. The dowels of the icon should not be allowed to be pressed tightly against the walls of the vault. There should be at least one cm between them.
Contrary to some opinions, the item does not need to be sealed. Ventilation is required. Otherwise, it will be difficult to avoid mold formation.
Important points briefly:
- Ventilation is important for the icon case;
- There is a space of at least two cm between the image and the glass;
- Do not allow the dowels of the icon to come into close contact with the walls of the product;
- It is unacceptable to adjust the size of an icon to place it in storage.
If these simple rules are followed, the image can be preserved for many years.
But increasingly, glass in objects began to be replaced with plastic. However, it must be taken into account that it is not only unable to protect the icon as well, but also leads to its damage. Due to plexiglass, air access becomes much worse. As a result, an excellent environment for the proliferation of bacteria is formed.
Beaded icons
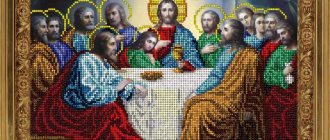
Many people ask how to make an icon with their own hands using beads. There is nothing complicated about this:
Handicraft stores sell excellent ready-made kits for bead embroidery on fabric. The icon “With a Baby in Her Arms” is especially popular. There are many images, you need to choose the one to which your soul is drawn. When embroidering with beads, the picture is printed on canvas with a ready-made pattern. The beads have also already been selected. The embroidery technique is described in detail. A special thin needle is included. Beads need to be scattered into special small containers, which are sold in the same store
Each color will have its own lockable cell. It is convenient to embroider on a special hoop. It is important to have good lighting.
Believe me, after embroidering one icon, you will want to continue working. This is a lifelong passion.
Think about it, it’s not for nothing that your soul reached out to God. This means it is necessary. Embroidery will give peace of mind and joy. Gradually, the tormenting fears and worries will go away, because you already have a purpose and meaning.
When reading prayers, thoughts come into harmony, worries recede away. Internal attitude is very important. You need to ask the saints for help and healing for yourself and your loved ones. Your prayers will be heard and you will receive comfort.
The finished embroidered icon must be beautifully decorated. It is better to give it to professionals in a framing workshop. The icon must be consecrated in the church. If you wish, you can ask for a blessing.
You can give the icon as a gift or keep it.
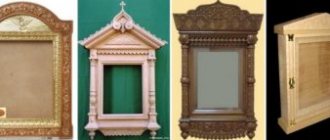
Types of wooden icon cases
The most common material for manufacturing is wood, but metal, glass or plastic are also used for manufacturing.
Kinds:
- wall, floor, portable, corner;
- arched, curly, straight;
- temple and home;
- for one or more icons;
- decorated with carvings, gilding, painting, cast elements, etc.
The craftsman selects the shape and design according to the icon for which the decoration is being made.
Wall mounted
Wall chests can be of various shapes, decorative, simple, glazed, with an opening door or without glass, for one icon or several. The main difference is the mounting for hanging on the wall. The icon can be placed in such a wooden icon case in a church, on the street or at home.
Floor-standing
Floor and wall cabinets can be very diverse in shape and design. As a rule, they are made for icons of large sizes, which is why they themselves are large and even bulky. Therefore, they are located on the floor in churches or on the street next to them.
carved
Carving is the most beautiful and multifaceted type of decoration. It is used around the frame or at the top and bottom, as a frame pattern or a separate design. In such a frame, the icons of the Most Holy Theotokos or the Savior Not Made by Hands look especially festive and solemn.
Direct
The most common form of chest is a rectangle or square, corresponding to the size of the icon. Often found with rounded corners. Simple straight icon cases are often used at home. They come with or without glass doors, mostly in small sizes for easy portability.
Arched
Icons can be different, so the frame for them is made in accordance with the shape. Arched boxes are often made for dimensional icons depicting the saint whose name the baby is named, for example, St. Sophia, St. Eudokia, Basil of Ancyra, or St. Seraphim. Such icons have a size equal to the height of the baby.
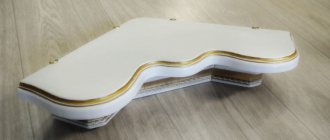
Curly
In addition to standard forms, icon cases can have a figured crown - the upper part. The pattern can be varied, from simple, wavy or with capes, to complex, ornate patterns, decorated with carved elements or a cross.
Types of icon cases
The icon case can be wall-mounted or floor-mounted. It depends on where exactly the icon is located. As a rule, in most churches you can see portable icon cases or, as they are also called, cabinets in the form of pencil cases or boxes, which are designed to store holiday icons on the central lectern. They can be completely closed or open.
Often, in addition to framing, glass is used. This icon case is intended for especially valuable images. An icon case can be quite simple, without glass or any decorations. But in churches, as a rule, there are beautiful icon cases, richly decorated with carvings. The style of the temple, the expediency of decorating a specific sacred image, as well as its location determine how the icon cabinet will be decorated.
Wooden icon cases
The most important value in a believing family is an icon depicting Jesus Christ, the image of the Virgin Mary and saints. But they need to be protected from negative factors: dust, soot from candles, moisture, temperature changes. After all, you want to preserve icons dear to your heart in their pristine beauty. The miraculous face must be kept in spiritual and material purity, then the icon has a beneficial effect on a person and works real miracles. Over time, an icon case was made to store icons. This is a special cabinet or casket with glass doors. Thanks to faith and hope for the salvation of the soul, thanks to prayers in front of the iconostasis, the icon case creates its own energy of love for one’s neighbor and happiness. Previously, every village house had its own intercessor - an icon. Even if the family was very poor, they found a way to acquire the holy face. Nothing was needed more expensive than that.
Now not only in villages, but also in big cities, people more often begin to turn to the church for help and peace of mind. Faith in God gives strength in difficult periods of life. A city dweller, in the bustle and haste, tries not to forget about his faith and church. You need to atone for your everyday sins not only in the temple of God, but also at home. Therefore, today almost every apartment has a treasured corner with icons of saints. But it’s still better to arrange them in an icon case. They are different. The more skillfully and richly it is decorated, the more pleasant it is to pray without thinking about the bad and without being distracted. Antique expensive icons must be stored securely in an icon case.
The choice of lockers is very large, so you need to buy exactly the one that takes your breath away. Icons have a variety of shapes and finishes. Most often, the frame consists of a wooden carved ornament. The author himself shows his imagination in the design of the product, putting his soul into each work. The craftsman makes frames for home, road, street use and, of course, for the temple. Therefore, the sizes and design are different for everyone. The casket with icons can be placed on the table, on the floor or hung on the wall. In order for the icon case to last for a very long time and be passed on from generation to generation, it is made from valuable wood. There is a removable wall at the back for installing icons, and a glass door at the front. The icon case is decorated with gilding and carvings. But if the icons in the house are not expensive, then the cabinet should match them. When praying, it will be very difficult to concentrate on the image of the saint, because the decorations will be distracting.
A skillfully made icon case creates harmony and peace in the house and fits perfectly into the interior. As a rule, priests advise installing an icon case in the eastern part of the apartment. But sometimes this is impossible. Therefore, it’s okay if the icons are located in another free place. The main thing is that they are not located near the TV, computer, stereo system or other household appliances. The exception is the office, where you can put a small icon case on the desktop. Also, you cannot hang photographs, paintings, or decorative items near the iconostasis. Some Orthodox Christians are of the opinion that the image of the saints should be in the far right corner, so that upon entering the apartment one can immediately bow and read a prayer. There are a lot of different opinions and advice on choosing icon cases. Therefore, you just need to listen to your heart, it will definitely tell you and guide you to the right choice. After all, not one icon will answer a person if he does not have real faith and repentance. Time has proven that an inexpensive icon helps to heal seriously ill people with hope and faith in their souls than one decorated with gold for the restless. Peace and love to your home.
History of the red corner
Home iconostases appeared in Ancient Rus'. A whole corner was set aside for them, which was called red (i.e. beautiful). In this place, icons were placed, candles and lamps were lit. In the morning and evening, as well as at times of special spiritual need, household members said their prayers here.
The iconostasis of those times was a multi-tiered shelf on which a god was hung - a small curtain that covered the images of saints and the Savior on the sides. The icons were hidden under the gospel - a special cloth that was pulled back only during prayer. It was no coincidence that such a tradition appeared in Rus'. It is known that the first image of the Savior would have been created by Himself, according to His will of God: after Jesus sprinkled his face with water and wiped it with ubrus (cloth), His face remained on this canvas. He sent this painting to the sick ruler of Asia Minor, Abgar, thanks to which he was healed. After this, the prince gave the order to nail the sacred board over the gates of the city. After 900 years, the sacred image was transferred to Constantinople. Now every year on August 29, Orthodox Christians celebrate the feast of the discovery of the image of the Savior Not Made by Hands and consecrate hand-woven fabrics.
Existing differences
Products are differentiated depending on such factors.
| By location: | - on the wall, - on the floor, - corner, - hanging, - analogue. |
| By location: | - in the temple, - in the church, - at home. |
| By appearance: | - straight, - carved, - figured. |
| By number of icons: | - for one image, - for two. |
| According to the material from which it is made: | - from valuable wood, - from metal, - from plastic. |
| For decorations: | - with wood carvings, - painted, - lacquered, - silver plated, - gilded. |
The cost of the item will also depend on these factors. Even precious stones or metals are used in the manufacture of some works. The cheapest products are made of wood.
You can simply answer the question, what is an icon case? After all, it is also called a temple or a house for an icon. Creating icon cases is a task that requires good craftsmanship. Many people get carried away by making them with their own hands. An amazing work of art can come out of an ordinary box.
Making an internal frame for an icon case
If you have already made standard picture frames, then you can safely skip the description of this stage. The inner frame of the icon case is made in the same way. If not, then read on.
Make your own or buy profile bars in a store, cut them at an angle of 45 degrees and glue them together. The dimensions of the bars depend on the size of the icon. Faced with a significant thickness of the shrine? Then the thickness of the frame will be greater.
If the shrine does not have a stretcher, then you will have to do additional work with the canvas. Take regular furniture plywood, fiberboard or MDF with a thickness of 4 to 6 mm and stretch the canvas.
Making an external frame for an icon case
Let's start working on the slats for the box. The width of the slats must match the depth of the icon case. Therefore, think in advance what the dimensions of the product will be.
To install the glass, you will need a recess in the case. For its manufacture, facade bars are useful, which must be glued to the edges of the body strips. An internal frame should fit inside the blanks of the icon case walls. Before gluing the corners, first file them at 45 degrees. When gluing, it is convenient to compress the box using rubber bands
Wait for the glue to dry. Using a circular saw, make two cuts in each corner. Glue flat tenons there that match the thickness of the cuts: this is necessary for the durability of the body. According to the experience of the craftsmen, it is advisable not to use nails, metal corners and self-tapping screws for this purpose.
Cut off the excess thorns and begin sanding the product. The next step is to mark the back wall and drink according to the marked marks.
General work
Cover both frames of the icon case with tinting. The frames should also be varnished. With the right selection of varnishes, you can effectively imitate the colors of valuable wood species (if desired, of course).
The next step is the complete assembly of the icon case. To do this, you will need to cut the glass to fit the body. It should then be secured in place using silicone.
The image is placed in an internal frame, which, in turn, is placed inside the case. Then you need to close the back wall from the outside and secure it with a stapler. To attach the icon case to the wall you will need 2 canopies: install them.
Now you know how to make an icon case with your own hands.
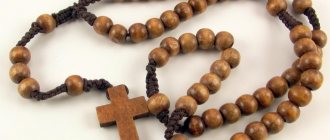
Macrame icons.
Macrame is a knot weaving technique. It has existed since ancient times. Some historians argue that its origins should be sought in China and Japan, and in the 8th-10th centuries macrame comes to Europe, where, according to some, macrame received a great contribution thanks to navigation. The sail system on ships required specifics in tying knots, as a result of which knots of different beauty and functionality arise, the number of which numbered in the thousands.
In general, the history of macrame can be traced back to ancient times among many nationalities. The same can be said about Rus'. Macrame originated during the pagan period and the Slavs attached great importance to knot weaving. It was more of a sacred (ritual) action, and the drawings themselves reflected the worldview of the Slavs. After the baptism of Rus', macrame began to be banned as a certain type of witchcraft.
A real macrame boom was observed in Europe in the 18th century, and in Russia in the 19th and early 20th. The older generation remembers how during the Soviet Union, woven collars were very popular.
It is difficult to say when the first icon made with knotted weaving appeared. Macrame icons are distinguished by their sophistication, softness, and calming effect.
We can say with confidence that of all the methods of making icons, macrame is the most labor-intensive and time-consuming. And accordingly, such icons are very expensive.
Tools and materials for making an icon case:
First you need to prepare certain materials and tools for the job.
Sample set of tools:
- wood hacksaw with fine teeth;
- miter box - a special device for cutting material at an angle;
- clamps - clamps for fixing parts during processing;
- metal ruler in the form of a corner;
- a screwdriver, a universal one with replaceable bits is better;
- pliers and side cutters;
- emery cloth or abrasive mesh;
- clip-holder for skins;
- electric drill and set of drills for wood and metal;
- hammer;
- sealant gun;
- large knife with replaceable blades;
- elastic spatula;
- brushes for coating the product with oil, varnish or stain.
Approximate list of materials:
- frame of the icon case made of wood (the easiest way is to buy a ready-made baguette);
- wooden slats for the side walls of the icon case;
- a backdrop for which both plywood and hardboard are suitable;
- fittings, you will need nails and screws of different types, hinges for attaching the door and a fastener;
- cord for laying between the door and the drawer itself;
- glue for wooden parts and cord fastening;
- wood putty;
- sealant;
- glass;
- oil, varnish or stain to coat the finished product.
Making an icon case with your own hands 12/26/2019
Today, many homes of Orthodox families have icons. The choice of icons is an extremely individual matter; believers choose them by listening to the voice of their hearts. In Orthodoxy, there is no strict regulation of the order of placement of icons in a home, but traditionally icons are placed on the eastern side of the house - they are hung, placed on shelves and quite often placed in beautiful wooden icon cases.
rice.
1 Icon in an icon case What is an icon case, and why is it needed?
Essentially, an icon case is a kind of cabinet designed to store an icon. It performs a specific function - it protects the icon from dirt, dust, and various types of mechanical damage. It is thanks to the icon case that the faces of saints on the icons are perfectly preserved in a special microclimate: 1. Icons standing in icon cases are less susceptible to the negative influence of changes in air temperature and humidity (this is not uncommon even in modern homes);
2. The icon case protects from drafts, direct sunlight, and droplets of moisture that accidentally fall on the icon;
3. An icon standing in an icon case is not so afraid even if it is close to a heater, air conditioner or central heating radiator.
You can, of course, simply buy wooden icon cases, but it is much more interesting to make an icon case with your own hands. Created with warmth and love, it will charge the icons with special, spiritual warmth, especially if an old family icon is stored in it.
rice. 2 Icons can vary greatly in appearance
Materials and tools
Most often, icon cases are made, in accordance with the recommendations of experienced icon restorers, from well-dried wood, most often from beech or pine.
To make icon cases, the craftsman will need the following materials: 1. planks for the box (beech, pine); 2. two types of glue – acrylic and rubber; 3. baguette, hardboard, cord; 4. sealant; 5. iron and brass nails; 6. hinges, suspension, box-type clasp 7. glass.
rice. 3 Pine is a popular choice of wood for icon cases
In addition to materials, tools will also come in handy. There should be no problems with them; you will need standard tools; every man who at least occasionally makes something will probably have them. So, to make icon cases with your own hands, you will need the following tools:
1. Miter box (special emphasis for correct sawing of planks, at the desired angle); 2. A hacksaw with a fairly fine tooth (high-quality tenon hacksaws are ideal); 3. The most common simple pencil, ruler and tape measure; 4. Clamps - special clamps with which the master will fasten the planks on a work table or in a miter box in order to cut the planks efficiently, without distortions; 5. A ruler-corner made of metal, it will be convenient to mark cuts at the required angles, as well as measure the dimensions of the parts of the icon case; 6. You also can’t do without pliers and a side cutter; 7. You will also need a screwdriver, Phillips or universal, with a set of interchangeable tips; 8. Sandpaper (fine) and a special holder for it will also come in handy; 9. Electric drill with a set of drills; 10. Gun for sealant (it will be used to fix the glass); 11. Elastic spatula; 12. Knife with a set of replaceable blades; 13. Brushes for painting the icon case with stain, varnish or oil.
rice.
4 Prepare tools for woodworking Making icon cases for icons - main steps Step 1.
At the very beginning, you need to create the correct drawing of the future icon case. For the drawing, it is necessary to measure the width and height of the existing icon, as well as the thickness of the wooden board and the height of its deflection (antique icons often bend). If, say, the distance from the table surface to the bending point is 40 mm, then for the side of the drawer you will need slats with a section of 15 by 45 mm. It is important to draw up the drawing so that the icon is not cramped inside the finished icon case.
Step. 2
Finished wooden planks must be cut into the required sizes, according to the length and width of the sketch. It is important to cut the boards strictly at right angles.
Step. 3
On the sidewalls, along the edges, you need to make markings using a square, adding 1 mm to the thickness of the board. Next, using a hacksaw with fine teeth, cuts are made on the sides of the icon case; it is important not to cut 5 mm to the edge.
Step. 4
At the next stage, you need to take a sharp knife, place it at the end of the boards, and peel off a quarter of the wood, tapping the knife with a hammer. If it is chipped unevenly, it must be carefully trimmed.
rice. 5 Making an icon case yourself requires some skill Step.
5 Next, on a flat table you need to assemble the entire box of the icon case, fitting it with clamps. The joints should be coated with glue. It is important to correctly align the edges of the box joints and tighten the clamp nuts well and evenly. If the glue has come out, you can remove it with a slightly damp cloth.
Step. 6
Using a square, you need to check the internal corners of the icon case and correct any irregularities. The box should be left to dry for 10-12 hours.
Step. 7
After this time, you can start sanding; you can sand it with a sanding machine or sandpaper. Next, you need to trim the edges of the box with a plane.
Step. 8
Next, you will need to draw lines on the bottom and top sides of the box, as well as on the sides, 20 mm from the edge, for the future door. You need to carefully saw off the frame according to the markings.
Step. 9
Then, from hardboard, the back wall of the box is cut out, 5 mm less than the front perimeter, on each side.
Step. 10
Then the frame is placed with the sawn part on a flat table, and a wooden layout is taken (width 30 mm, thickness 5 mm). One side of the layout is sawed off into a miter box using a hacksaw at an angle of 45 degrees. Now the length of the side of the layout is marked, and its second corner is sawed off.
rice.
6 The icon case can be quite simple in shape . Step. eleven
The sides of the frame are smeared with glue, the layouts are applied to them and tightened. Now you need to adjust the next corner of the layout; there should be no gaps at the junction. Thus, the layout is completely glued.
Step. 12
Next, the door needs to be sanded and the hinges installed. Hangers are placed on the dried box, a hardboard back wall is nailed, and glass is inserted into the door. The glass is fixed with a reliable sealant. Wood putty can also be useful during the work process - it perfectly hides flaws in the wood. It can, for example, mask the joints of parts and other unforeseen defects. Wood putty is now sold in different colors, it makes sense to choose a domestic one, it is inexpensive and very economical!
You can watch the process of making a carved icon case for a specific icon in the following video:
Accessories for the icon case and surface treatment
Everyone makes the design according to their own taste, accessories for icon cases are sold today in a wide variety. Properly selected fittings give the icon case a finished look and functionality. For the icon case you will need the following fittings: miniature hinges (for fastening the door), a “box” clasp, a special pendant ring, miniature iron nails and small brass nails for attaching the clasp, a decorative patch lock (optional).
rice.
7 When making an icon case, you will need accessories. To tint the icon case, you can use either a high-quality alcohol-based stain or a protective, colored oil. The second option is preferable, because the oil will work both as a tinting material and as a finishing material. To add shine and additional protection, the icon case is coated with varnish.
rice. 8 You can decorate the surface of the icon case with carvings
How to make an antique icon
We will make the icon “Mother of God with Hand” on a tree:
- A wooden board or plywood is covered with stain.
- After drying, a layer of white paint is applied.
- You can then coat it with silver or gold paint.
- A thin layer of red paint is applied, but this is done if desired. You can leave it as is. The gold or silver base should show through the layer of red paint.
- Apply newspaper to wet paint and quickly remove.
- This needs to be done several times. This gives an “aging” effect.
- On top you need to apply a thin layer of gilding and varnish again.
- After drying, the cut out image of the icon is pasted on. You can apply the previous gluing methods.
- Everything is covered with a layer of transparent varnish.
This is a miraculous icon that gives people healing from many diseases.