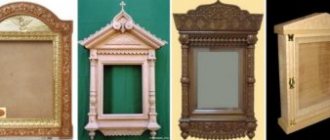
An ordinary white wooden frame can easily be turned into a real work of art, because all you need to do is decorate it with beads or stones. The main thing is that the beads you choose for the frame are combined with all the primary colors and their shades used to create this icon. Also often used for decoration is a frame for an icon, thanks to which its appearance can radically change.
How to beautifully decorate a picture from beads
There are no clearly defined instructions for designing bead embroidery . However, there are a number of general rules for choosing a picture frame:
How to choose a frame for an icon embroidered with beads
Important! It is recommended to hide a beaded icon under glass. This will preserve the cleanliness and quality of the embroidery, and dust, moisture and mechanical damage will not spoil the accessories . According to the canons of the church, beads should not come into contact with glass.
Embroidery hoop: what is it, what size is needed?
Frame-shaped hoops are used both during the work process and when decorating the finished painting. The outer ring on one side is usually covered with a rubberized material to pull the fabric tightly and prevent deformation of the embroidery.
Photo 1. The hoop is designed to fix the picture, the fabric is stretched and it becomes easier to embroider, while the image is not subject to deformation.
The outside of the hoop is covered with paint with decorative elements. The inner circle is made of plastic. The clip is made in the form of a loop so that the picture can be hung on the wall .
Technique step by step
For those who are just starting to embroider with beads, there are step-by-step instructions:
- First, the thread is threaded into the needle.
- Next, a small bead is strung on it.
- When the needle penetrates the wrong side, a tie is made. Afterwards, the needle returns back at a distance of 1 mm.
Next, the beads are strung again and the steps are repeated. In practice, there is nothing complicated here. The main thing is to maintain the distance between stitches. If they are the same, and the edges of the beads are directed in one direction, the icon will turn out very beautiful.
Ready-made kits will help make the job easier for a beginner. Usually they already have a detailed diagram, instructions and material.
How to make your own frame
When making a frame with your own hands, you need to take into account some nuances . There must be a gap between the glass and the beads, and it is important to place the picture strictly in the center, without distortions to one side. Before framing, the embroidery is washed, then interlining is glued to the inside and ironed.
Baguette for embroidery
Important! use an old photo frame to make a baguette
Fastening with pushpins
For the frame you will need:
The embroidery is stretched onto a sheet of plywood and secured with buttons. However, this option is short-lived . The fabric may come apart and hang on the buttons.
Using threads
Materials for making the frame:
The work is stretched onto a sheet and secured with pins, leaving 2 cm on each side .
From the inside, the remaining allowances are sewn together with large stitches (right to left, bottom to top).
During operation, you need to watch the front side to avoid deformation.
Using double-sided tape
Materials for making the frame:
Important! The quality of gluing depends on the fabric, so it is recommended to use instant glue. The work can be secured with single-sided tape on the wrong side to prevent the fabric from unraveling.
Stitching method
on all sides of the sheet at a distance of one centimeter from the edge. Then the fabric is attached to the plywood at the corners so that it does not slip, and a seam is made with the needle forward.
DIY design with passe-partout
For the mat frame you will need cardboard, pins, a sheet of plywood, small nails, as well as PVA glue and a stationery knife:
Cardboard can act as a background for a picture; for this, a silhouette is cut out in the middle of the sheet according to the size of the image. The resulting frame is placed on the face of the embroidery. A backing is placed on the wrong side. The fabric is stretched and secured with pins. Then the canvas, the front part of the cardboard and the stretcher .
Important! There is an option to create a textile mat as a background for embroidery. In this case , instead of cardboard, take a thick piece of fabric , inside of which the silhouette of the image is cut out.
The material is placed on top of the canvas and carefully sewn along the contour around the embroidery. Then a stretcher is applied from the inside out.
What icons are needed?
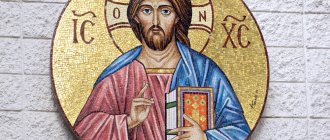
First of all, every home should have images of the Savior, the Mother of God and St. Nicholas the Wonderworker. Of all the icons of Our Lord, the half-length Image of the Almighty is most preferable for home prayer. On such an icon, Jesus Christ holds in his left hand an open book in which is written “I give you a new commandment: love one another.” With his right hand the Lord baptizes the person praying.
Among the images of the Mother of God, the Russian people especially loved icons such as “Tenderness” and “Hodegetria” (Guide). In the first image, the Virgin Mary holds a baby in her arms, who gently hugs her neck and presses her to her cheek. The most famous icon of this type is the Vladimir Icon of the Mother of God. Its distinctive feature is that the baby’s left heel is completely turned outward. In the image of Hodegetria, the Mother of God is depicted with a baby, who holds a bundle in her right hand, and with her left hand makes the sign of the cross over all those praying. A striking example of this image is the Kazan Icon, “Quick to Hear,” and “Support of Sinners.”
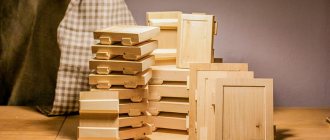
How to make a frame with your own hands?
Of course, you can buy a ready-made frame cheaply in a store, but it turns out that the icon or the picture is of non-standard sizes, or the frame itself does not inspire confidence. And then all that remains is to either make the frame yourself or order it from a craftsman.
Here I will talk about how to easily and efficiently make wooden frames.
First, I prepare the material for the baguette - I select exclusively clean, knot-free slats.
I give the desired profile to the slats cut to size using a router and shaped cutters. You can also give the profile manually, using special planes - a zenzubel and a molding tool. You can additionally decorate the front profile with carvings.
I file the prepared slats exactly to size “on the miter” (that is, at an angle of 45 degrees).
At the beginning of my woodworking practice, I tried all the methods of manual miter sawing (this is actually the most difficult and crucial stage in making frames) - I sawed the baguette in a miter box, and in a corner vice, and sawed it in homemade jigs (like the one what is in the picture below);
...wow, it was a troublesome and lengthy operation... In the end, I came to the conclusion that the best tool for sawing frames is a specialized precision tool that costs a lot of money.
For example, I personally use an expensive miter saw for this, and you can also purchase special combinations of a hacksaw and a miter box at large framing stores specifically for joining the baguette. In any case, to ensure high-quality and quick connection of the frames, you need to shell out 10 thousand rubles.
Additional images
In addition to these main icons, on the home iconostasis you need to put images of saints after whom your family members are named. It is also advisable to purchase an icon of the healer Panteleimon - a healer of mental and physical illnesses. The choice of other images depends entirely on the needs of the household. For example, you can purchase an image of Peter and Fevronia, to whom they pray for family well-being. In front of the icon of Sergius of Radonezh they ask for help in their studies and good endeavors. Unmarried women can pray before the image of Xenia of St. Petersburg, who, by the will of God, became a helper to people in matters of marriage.
Recently, in many homes, one of the central icons has become the image of the blessed old lady Matrona of Moscow. Even after her earthly death, she helps in everything those who come to her at the Intercession Church or to her grave at the Danilovskoye Cemetery, or simply turn to Matrona in home prayers. Many people have already received healing and help from her. It was not for nothing that she said: “Come to me and tell me everything as if you were alive.” By this, Matrona meant that her earthly death does not mean a spiritual death: after all, she is still with us.
Other ideas
Once the master has understood the basic nuances of beading, you can begin more complex projects. By the way, they will be discussed below. Now it’s worth considering a few points for those who see a commercial nature in this art:
- You can sell finished products, but only if they belong to the canonical types and are made of the proper quality.
- Before placing a work on the market or on the Internet, it is advisable to discuss it with a priest.
It is not necessary to wear a scarf or pray before embroidering. The main thing is that the master believes in what he is doing while working. Icons of God with beads are made only when you are feeling well.
What else was placed on the shelf for images?
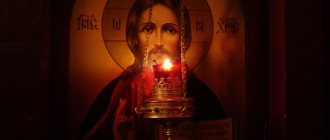
Home iconostasis of those times were also intended for storing holy water and prosphora. The household hid the Gospel and memorial books (special books in which the names of all the deceased and living Orthodox Christians of this family were kept) behind the god. Particularly skilled needlewomen created doves (as a symbol of the Holy Spirit) from scrap materials and hung them from the iconostasis. In the red corner it was obligatory to have lamps and candles, which were lit during home services.
A similar small temple was in every Orthodox home until the 1917 revolution. After the Bolsheviks came to power, people continued to pray, but they did it in secret. Therefore, from the richly decorated home iconostases, only a few images remained, which people carefully hid from prying eyes, fearing persecution. The modern red corner is somewhat different from the one created by our ancestors, since many of the traditions of its creation have simply been forgotten.
Hot enamels.
It is used for applying surfaces in the manufacture of porcelain products, as well as in a special type of decorative and applied art - “Enamel”, which uses special enamels and metal. This technology appeared in Rus' in the 17th century, and it was used mainly to make jewelry that only wealthy people could afford.
The copper plate is coated with a special white refractory enamel, onto which a pattern of refractory enamels of various colors is then applied. Subsequently, firing was done in a high-temperature oven.
Icons made using the enamel technique are distinguished by their particularly bright colors, rich and detailed subjects, naturalistic shades and a wide range. Often, enamel icons are decorated with various frames and frames made of precious metals with fine embossing of various patterns and ornaments, as well as precious and semi-precious stones.
Making the corner red
You can decorate your home iconostasis with fresh flowers and willow branches after the Twelfth Feast - the Entry of the Lord into Jerusalem. And on the day of the Descent of the Holy Spirit, shelves with images are framed with birch branches, as a symbol of the grace of the power of God.
You can also install reproductions of images on the shelf for icons. They must first be consecrated and then added to the home iconostasis. Embroider an icon case (frame) for them with beads, and then they will look harmonious with other icons.
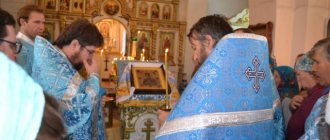
Is it possible to consecrate products?
By the way, there is quite a lot of controversy on this matter. The only correct solution is to take the diagram or drawing to the priest and clarify whether the sketch corresponds to Christian canons.
After receiving the blessing, you can start working on embroidery. After finishing, you must come to the church to consecrate the work.