Wooden base
Wooden bases for icons.
Photo: iconmaster.by Icons, especially in ancient times, were created strictly according to technology. They wrote them on pre-dried wooden boards. Most often they took linden, ash, and imported cypress. Resinous species - spruce, pine - were used less frequently, since they required complex preparation and long drying. If the boards were not dried enough, they often cracked, and liquid rich in essential oils flowed out of the cracks in drops. In addition, a cut of such a tree could be covered with a resinous film, which interfered with the application of a pictorial layer.
The block was necessarily cut from the core of the log, since in this part the wood deforms less when drying. If the icon is slightly bent, most likely the craftsmen took a different part of the wood.
Often, not a solid wooden base was used, but a glued one. The bars were connected to each other using a special solution and polished. On icons with glued canvas, dowels are visible on the reverse side - narrow boards that span almost the entire width. They were inserted to ensure that parts of the canvas did not deform or move.
Medieval craftsmen strengthened the canvas in another way. On the front side, they removed the top layer of wood everywhere except for narrow strips around the perimeter. The result was a flat depression in the center - an ark - and frames along the edges. This design made the canvas more resistant to curvature. The Ark also served other functions. The main image was applied to it, so the frames protruding along the edges helped to protect the faces from scratches. It was easier to cover the image with drying oil: the product did not flow out of the ark. With frames, the icon looked more harmonious and created the feeling of a window into the world of saints.
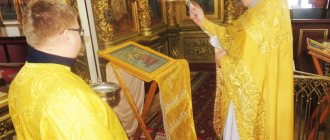
How to make an icon with gold ornaments
To decorate an icon, gold leaf is often used, which can be polished or not, it all depends on the icon painting style of the icon. You can read more about gilding styles and their combination with iconographic images in this article.
In addition to simply applying gold, the Russian school of icon painting (and many others) uses all kinds of ornaments on the icon painting board. There are two ways to do this. The first one is suitable for beginner icon painters and gilders, as well as when choosing a complex or geometric ornament. This method involves preliminary carving with special tools - they are called digits or counts (we have a separate article about these tools) - on gesso, after which polyment is applied and gold is applied on top. After applying polyment and gold, the ornament may “sink” a little and cease to be as distinct as before. It can be left as is, but it is better to deepen it and refine the ornament on top of the gold using specially shaped agate teeth. We recommend using agate teeth from our production No. 3, No. 5 or No. 6 for this (you can view and purchase them in our catalog on the website). You can read about how to choose the right agate tooth shape for your type of gilding in this article.
Carving with digits according to the drawn ornament
Photo from Facebook Natalya Pustylnik
Another method of carving an ornament is suitable for simple floral ornaments and only for experienced gilders. Here, using agate teeth (again, forms No. 3, No. 5 and No. 6), through a prepared pattern printed on paper or tracing paper, the ornament is transferred directly from above onto the gold (the contours are first outlined with a ballpoint pen, and then drawn with agates). This method is widespread in Romania and some other Eastern European countries.
Extruding an ornament on top of gold with a ballpoint pen
Photo from Facebook Nikolaev Miruna
The third way to apply an ornament is to carve on gesso using special gravers. To do this, you need to take a very thick gesso (2 or more millimeters thick) and, having translated the design in advance, cut it out. This method is very labor-intensive, but allows you to make very deep carvings (which, by the way, is not suitable for all styles of icon painting). Such an ornament must be gilded only on the face, since then the consumption of gold will be the most optimal. In addition to gravers, various tools can be used for embossing directly on gesso (they differ significantly from our tools, intended only for working on top of gold!).
Carving with gravers on gesso.
Screenshot from Facebook video Elena Konek
The first method is suitable for most work, since when using it you always have the right to make a mistake and the opportunity to correct this mistake. We also teach this method at our gilding master classes (you can read more about them and sign up here).
So, let's consider the first method, as the most suitable for beginning gilders.
First we must select an ornament and arrange it on the icon board. You can use ready-made elements, arranging them in different combinations, choosing separately the ornament for the fields, corners, halo and ark of the icon board. We recommend paying attention to collections of Arabic style ornaments, as well as ready-made works by recognized masters of icon painting. In addition, our new two lessons are devoted to the analysis of this topic, completing the learning process for our students - “Development and combination of ornaments.” More details in the Master Classes section.
To get started, you can use ready-made ornaments, which are available free of charge to everyone on our website in the Ornaments .
The ornament was translated, some elements were drawn and corrected, combining them into a whole picture and bringing some “curls” to their logical end. This can be done conveniently using a regular automatic pencil. You can read more about how to transfer an ornament to an icon board in this article.
Next comes the stage of cutting out the ornament using graphite. We also have a separate article about this, so it’s better to read it, everything is described in detail there.
When the ornament is cut out, we move on to the next stage - applying the prepared polyment with glue (you can read about how much and what kind of glue to add to the polyment here). Since this article is a review and the topic is extensive, we have also separated it into a separate article on the application of polyment.
After which comes the gilding itself. When we put the gold down and stamped it with a cotton pad, we will see how our design appears on the gold. However, often only thin lines will be visible. Sometimes this is enough, but most often the gilder wants to expand and deepen the ornament. Here agate teeth of special shapes come to his aid (we make teeth specifically for icon painters, so we do not have extra and unnecessary forms of agates, each has its own purpose, and often they can be used in several different operations. How to choose an agate tooth can be read in this article). To cut ornaments on gold, we recommend using teeth No. 3, No. 5 or No. 6. You should not move the agate tooth along the gold slowly and carefully, but with some boldness, trying to make one element of the ornament in one movement. If we draw a tooth “carefully”, then instead of an ideal result we will get an uneven and broken line. If our ornament is also geometric, then we definitely need to use a plastic ruler.
Once the design is cut, it is time to polish. For selective polishing in the Russian style (you can find out what styles of gilding and polishing exist in this article). To polish the inside of various elements, you need to use agates No. 1 or No. 7, depending on the size of your ornament. Polishing should be carried out with light pressure, since if you press hard, you will not polish the gold faster, but will only make unsightly strokes, like in a child's coloring book.
When we have polished the places we need in the ornament (for example, the vine and leaves in the floral ornament), we can begin to mint. This is a very exciting process, but you should show restraint and not “over-chain” the surface of the icon so that it doesn’t look tacky. Embossing is done using coins (they are made in the form of points of different diameters, for different sizes of icon boards) and a hammer, after which the time comes for figured punches. These are shaped stamps with sizes ranging from 3 to 5 mm (it is technically impossible to make them smaller, and larger than 5 mm is very difficult to apply by hand). The punches have a comfortable wooden handle and can be pressed only with the help of your hand. This allows you to apply the impression completely and control the entire process. If we apply a figured stamp with a hammer, then even if we move it by 0.5 degrees relative to the surface, we will get only half of the impression. With our hands we press in circular rotations and such mistakes are easy to avoid (and if they happen, they are easy to correct).
We produce stamps and punches ourselves (you can view and select them in our catalogue), taking as a basis the impressions used by old gilders on their immortal masterpieces, which can now be viewed in the Armory and other collections of ancient Russian icons.
Suzdal Museum, late 18th - early 19th centuries
After which comes the time for icon painting itself, which other masters of their craft can teach you. For example, we can confidently recommend master Alena Emelyanova ; you can see her work and contact her, for example, on her Instagram @icon.painter
We teach directly gilding and embossing icon-painting boards (we wrote a separate text on why you shouldn’t study multi-piece gilding remotely). Our master classes are held regularly on weekends in Moscow, several times a year in St. Petersburg, as well as in other countries. You can view the training program here, and you can find out more details and sign up for gilding lessons by calling the phone number
By the way, you can find out how we cover icons with gilding in this article.
We allow you to copy the materials of this article on any resource, but we ask you to always keep an indication of the original source of publication - //agat-zub.ru/stati-po-zolocheniyu/kak-sdelat-ikonu-s-ornamentom-na-zolote
Preparatory layer
Application of gesso. Photo: iconmaster.by
Before applying the painting layer, the craftsmen prepared the base. First, pavoloka, a special linen fabric, was attached to the tree. It was of rare weaving, “liquid” - so that the next layer, gesso, would seep through the threads.
Gesso was made in different ways; each icon painter had his own recipe. But more often, craftsmen mixed adhesive solution and chalk. Glue was bought or made from substances resembling modern gelatin. For plasticity, linseed oil was added to it.
Only fresh gesso was used, so it was made in the volume required for the canvas. For the first layer, more glue was added to the composition than chalk, and for the second, vice versa. On ancient icons, in places where they are chipped, you can see a white layer - this is gesso.
Often the faces were painted without pavilion, but almost never without gesso. On embossed icons, gesso was applied in a thick layer, and on carved icons - in several thin layers.
Painting layer and frame
Pigments for icon painting. Photo: ikona-radoneg.ru
Icons were painted with tempera paints; many workshops still use them today, despite the availability of oil paints. The fact is that tempera hardly darkens over time. The sarcophagi of the pharaohs of Ancient Egypt were painted with it, and these ornaments have still retained their color.
In Rus', paint was made using imported or local pigments. For example, blue was obtained from Greek lapis lazuli, and reddish-yellow ocher was made from simple clay and iron oxides - rust or other compounds. The shade of ocher depended on the proportions: the more iron oxide, the more saturated the color.
Powder pigments were diluted with natural emulsions - raw egg yolks or a whole egg. When the paint layer dried, its surface became matte, and if a little linseed oil was added to the egg mixture, then, on the contrary, it became glossy. The icons that we can see today are covered with a transparent protective layer. Nowadays they use varnish, but in ancient times craftsmen prepared drying oil: linseed oil was boiled under special conditions. It was then applied over the main image and onto the frames.
If small holes are visible on the front of the icon, it means that it was previously in a frame. These holes are traces of small nails that were used to attach thin metal plates to a wooden base. The frame was minted from copper, brass, and precious metals. Floral ornaments were embossed on the frame, and if the metal covered part of the icon, then the embossing on it repeated the design on the board. The frame not only protected the icons from damage, but was also part of the composition - it symbolized the light that emanated from the saints.
Icon. How a miracle is created. Part 1
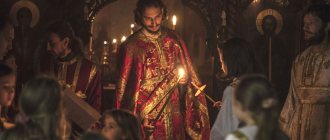
Recently, an icon of the Mother of God “Tenderness”, commissioned in the Urals, was brought to Buckingham Palace especially for the British Queen Elizabeth II. Now it flaunts in the royal chambers of the head of the Anglican Church, and the queen even prays in front of the image. Members of the august family explained this unconventional step for Anglicans simply: “Amazing power emanates from your icons.”
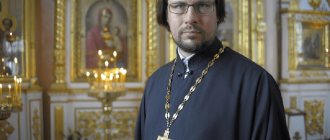
“There is something in the icon that allows us to understand the reality of the Divine,” say the icon painters themselves, people who come into closer contact with this mystery than anyone else. Getting to know the mastery of icon painting from the inside - won't it help you touch this miracle and understand the words of the priest and scientist Pavel Florensky: “If there is Rublev’s “Trinity”, then there is God”?
365 days of one icon
The door of one of the workshops of the Orthodox St. Tikhon’s Theological University opens - and Saint George the Victorious “meets” us. For some reason, it is impossible not to recognize this saint, although in a large drawing made from his icon, he is depicted in a completely unusual setting: St. George on his horse transports across the sea a small man (he is several times smaller in size than the saint), holding in his hands vessel with wine.
This drawing was made by graduate student Nadezhda Stepanova from a photograph of a Cypriot icon from the late 13th century, which depicts a legend about a local miracle.
One young man was captured by the Hagarians right in the church of the Great Martyr George during a celebration on the day of remembrance of the saint. Exactly a year later, exactly on the day when the young man was captured by the Gentiles, through the prayers of his mother he was miraculously returned home. The young man served the Agarian prince at the table, and appeared before his amazed parents directly with a wine vessel in his hands. Talking about what happened, the young man said: “I poured wine to serve to the prince, and suddenly I was lifted up by a bright horseman, who put me on his horse. I held the vessel in one hand, and with the other I held onto his belt, and so I found myself here...” The icon, apparently, will be extraordinary. But it should be ready in a couple of months, and the image is only outlined in pencil, although students are given a whole year to prepare such work. The point here is not negligence, but simply the technology of painting modern images: before taking up a brush, there is nothing an icon painter has to take up...
Painting and carpentry work
One icon takes from several days to several months, sometimes more. Let's say, if this is an image with elements of wood carving - such a miracle is also in the workshop - then, of course, it will require “increased attention”. It all depends on the size, complexity, and also on the experience of the master.
Before taking up a brush, the icon painter is forced to devote several days to preparation. No, we are not talking about a thousand bows or a dozen akathists, and not even about the strictest fasting. Before the brush, the craftsman's hands include sandpaper, a chisel, a spatula, and many different tools and devices, including homemade ones.
Yes, any icon, of course, begins with a prayer. But technologically - from the board.
“Back in the 90s there was a real problem: where to get the board?
– recalls Ekaterina Dmitrievna Sheko, head. Department of Icon Painting, Faculty of Church Arts, STPGU. “It got to the point where we would find some scraps and write on them.” Today the issue is solved much more simply: specialized workshops are engaged in the production of bases for icons, where the boards are glued and dried in a certain way. The most common material is linden: it is dense and easy to process - as they say, cheap and cheerful. Sometimes - for example, for more expensive icons - beech, oak or cypress are used, and, if there is nothing at all, at worst you can use resinous pine.
Here the board lies on the table in front of the icon painter - and then he transforms into a craftsman rather than an artist...
To begin with, an “ark” is cut out - a recess on the front side of the board, a place for the future image. This is an optional element; the image “with a clear conscience” can be created on a single-level board.
Now can I paint an icon? Alas, no - it’s too early.
Now they glue pavolok onto the board - linen or cotton fabric (sometimes just gauze), which plays the role of a safety net: even if the wood cracks, it will not harm the image. In the most ancient Russian icons, as a rule, the entire surface of the board was covered with pavolokoy, but in the centuries since the 14th they learned to adapt the fabric only to places most susceptible to cracking - the joints of a multi-part icon board, local defects (knots, twists).
The manipulations, even more reminiscent of painting and carpentry work, continue... In the workshop, “foreign” words, “gesso” and “gesso”, are constantly heard, cutting into the unenlightened ear. “For example, I love this business,” admits Ekaterina Dmitrievna. “When it’s already hard to think hard in the evening after work, you can use a field grass.” It turns out that gesso is something like putty, it is made from animal glue and chalk. When the gesso dries, the board is covered with this very gesso - warm and thick, usually in several layers, with the obligatory drying of each. This is a serious matter: the thinner and more uniform the layers applied, the better the gesso will be preserved, and therefore the entire icon.
In ancient times, preparing boards for icon painting was often carried out by a special master - a gesso painter, and today his functions are shared between specialized workshops and icon painters themselves. The most “new” technology that appears here is sanding the board with sandpaper: a medieval icon painter would polish dried gesso with horsetail stalks .
Imagination: to be
When the board has become smooth as ivory, it must be possible to finally start painting the icon?.. No, it’s too early.
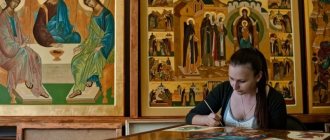
First, an accurate and neat pencil drawing is made on paper, the size of the future icon - it is double-checked, drawn and improved, in general, conscientiously brought to the ideal. Just such a sketch for the image of St. George caught my eye in one of the workshops. In my opinion, even now it can be exhibited, but this, it turns out, is just a “draft” for the future small masterpiece - an icon.
The fundamental differences between the work of an artist and the work of an icon painter begin here, at the stage of preparing a sketch, because an icon painter, unlike his fellow artist, cannot simply take a randomly invented plot out of his head and transfer it to paper.
In ancient times, icon painters trained in artels from childhood and by the age of 18-20 they turned into real masters, capable of painting images without peeking anywhere or copying anything. The secret is that they studied icon painting for a long time and purposefully, without being distracted by unnecessary objects, other types of graphics or unnecessary visual information - before the eyes of these lucky people there was only nature and specific patterns that they followed.
Modern students are deprived of such opportunities, so they always write from some kind of model - a photograph, an ancient image. What about imagination?
“You can imagine if you automatically imagine how to spell, for example, a young girl, and how to spell an old woman;
what type of clothing should a martyr have, what a queen should have, and what type of clothing a saint should have,” explains Victoria Viktorovna Solyankina, a teacher at the department. – If you clearly master this, then you can draw by simply looking at the description and starting from it. But not everyone achieves this, so, as a rule, you need a model to rely on.” And here the master is faced with the problem of choosing this very sample, the original source. One can imagine how incredibly many different icons were painted all over the world over 2000 years of Christianity: there are more conventional images, there are, on the contrary, more voluminous, with an academic bias; There are very simple, “ascetic” images, and there are even elaborate, overly patterned ones. PSTGU students adhere to the classics, generally preferring Russian icons of the 15th century (Dionysius, Andrei Rublev) and Byzantine icons of the 14th century, the period of the cultural heyday of the empire, to all examples.
NOT damaged phone
The attitude towards choosing a sample is part of tradition. It’s amazing how it hasn’t disappeared at all in more than 70 years of godless power that proclaimed a new art! The fundamental principles of icon painting were literally passed on from mouth to mouth and thus passed from pre-revolutionary masters to modern ones. For example, an unbroken chain of succession comes from the famous icon painter Juliania Sokolova (1899 - 1981), the spiritual daughter of Father Alexei Mechev and the founder of the icon painting school at the Trinity-Sergius Lavra, trained in the traditions of pre-revolutionary masters. Her successors and students trained the current teachers of icon painting at the Moscow Theological Academy, at St. Tikhon's Orthodox University, at the Theological Institute, etc.
So Ekaterina Dmitrievna learned the skill from I.V. Vatagina, student and assistant of Mother Juliana. The head of the icon painting department learned from her to never swear, no matter what the student does - the students themselves have already told me about this.
“We are trying to study the most preserved and classic samples in terms of design and color,” Ekaterina Dmitrievna continues to initiate us into the skill of icon painting. In addition to books, there is a whole database, from time to time it is updated with new photographs specially brought from Greece, Cyprus, Serbia, Macedonia, etc.
Loyalty to traditions – out of stubbornness?..
A drawing drawn from a sample is already half the battle. Then it is transferred to the board and... time to take up the brushes? No, it's not time.
Next comes the almost “culinary” stage: the icon painters begin making paints.
What would seem easier in the age of progress and consumption - go to the store and buy it! But the ancient tradition of making natural paints on our own continues today - and not at all because of the stubbornness of its custodians. Although homemade paints last no more than a week, they at least provide a unity of color that is incredibly difficult to achieve with acrylic paints. In icon painting, tempera paints are used, the history of which goes back more than 3 thousand years - even the sarcophagi of the Egyptian pharaohs were painted with such a letter. In Russia, this technique prevailed in art until the end of the 17th century.
Today, the process of making tempera is almost no different from the ancient one: the main ingredients are egg yolk and beer or wine. And I thought that the refrigerator in the workshop was only for “reinforcement of the brethren”!
So, the egg yolk is mixed with beer prepared in a steam bath (from 4 bottles after this procedure a sediment about 10-15 cm thick is obtained) - here it is, the finished emulsion. Sometimes vinegar is also added to this composition to make the paint last longer. If you need it for one day, the yolk is simply diluted with water.
The resulting emulsion is ground with color pigments - everything is almost like in the old days, with the only difference that the pigments can now be bought everywhere. There’s just one problem: Russian pigments are dull, because the earth doesn’t receive enough light during the short summer. Bright pigments from more sun-kissed countries, such as Italy, come to the rescue. This is how the generous Catholic Italian land becomes the basis for an amazing Orthodox Russian icon!
Self-expression of an icon painter
Paint colors - red, orange, purple, yellow, green, blue, blue, red-brown, brown-black, black. Here freedom is also very limited, for example, gray has never been used in icon painting and no one would think of trying, say, pink or sea green in this matter.
What happens - complete prohibitions, a minimum of creativity and self-expression?!
An icon painter differs from an artist in that he is not so free in his creativity. But a caveat is important here: an icon can only be partially called self-expression. After all, this is a reflection of not only personal faith, but also the congregational faith - perhaps more than one hundred people will pray in front of the image. So if you look at it, it’s not surprising that masters do not sign their icons and have never signed them, from time immemorial. “The author is the Church,” the students say unanimously, and this phrase is not at all decorative. On the contrary, this may be just the key to the secret of icon painting.
But the purpose of this creativity is somewhat different than presenting your rich inner world to the judgment of a critic or a curious viewer.
“An icon is still created in order to pray in front of it,” explains Ekaterina Sheko. “I don’t know how this happens, but a good icon—good in spirit—brings a person closer to the prototype that is depicted on it.”
It turns out that the canons and frameworks are justified by the enormous responsibility of the goal.
That is why in icon painting there cannot be random or spontaneous elements that abound in academic drawing, especially modern drawing, where everything depends on the taste and choice of the artist. Take, for example, the perspective: as a rule, the half-length image should be facing the viewer, and on Deesis icons (where Christ is depicted in the center) the saints depicted with the Savior are necessarily facing Him. This is the canon. But thrown back heads, profile positions, etc., which became popular in the 18th and 19th centuries under the influence of Western painting. did not take root in Russian icon painting: their deliberateness and some artificiality, or rather, inappropriateness, were too striking.
“Were you tempted to take up academic painting? Maybe you’re drawing something at home?” – I unsuccessfully ask both students from different courses and their teachers, anticipating an interesting conversation. There is also religious painting, after all. It turned out that even at home girls paint... icons. Despite the fact that they all came to icon painting in very different ways, an irresistible feeling is created that this was some kind of powerful revolution, clearly and uncompromisingly dotting all the i’s.
“I saw how icons were painted,” says fifth-year student Olga, “and I realized that I couldn’t be anyone else but an icon painter.”
What else is there to ask? But this is surprising: such a pillar in art as the coveted freedom of expression fades into the shadows when it comes to the icon...
Photo: Yulia Makoveychuk
Masters and schools
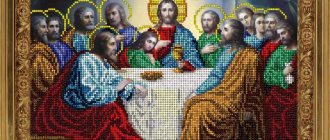
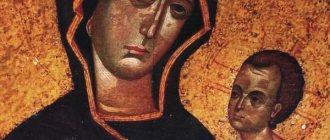
Andrey Rublev. Trinity (fragment). 1411 or 1425-1427. State Tretyakov Gallery, Moscow
Already by the 14th century, several icon painting schools had formed in Rus': Vladimir-Suzdal, Moscow, Novgorod, Vologda, and later Palekh, Stroganov and others. Each of them had its own characteristics. For example, the Novgorod one was distinguished by hammered writing, a rich palette and large elements, while the Vologda one, on the contrary, was distinguished by elegant painting and a slightly lightened tonality. Stroganov's writing is easy to recognize by the carefully painted faces, miniature scenes in the composition, as well as landscape panoramas with rivers and ravines, flowers and animals. Palekh ancient icons are more decorative, with an abundance of decorations, often in reddish-golden tones.
In different centuries, schools influenced each other and adopted certain features. Artistic subcenters were formed, which used their own painting techniques. In monasteries they took on complex icons for churches, and peasant masters chose simple subjects for family icons. Individual icon painters stood out: Theophanes the Greek and Daniil Cherny, Andrei Rublev and Simon Ushakov.